Module 1A: Camera Selection
MODULE 1: CAMERAS, LENSES, & ATTACHMENTS
Items relating to this module will include digital cameras, controls, menu settings, and accessories.
A. Camera Selection
Digital Camera Selection and Sensor Size
Selecting the right camera for an assignment should be based on how the finished image will be used and the size of the digital sensor required to produce an appropriate file size.
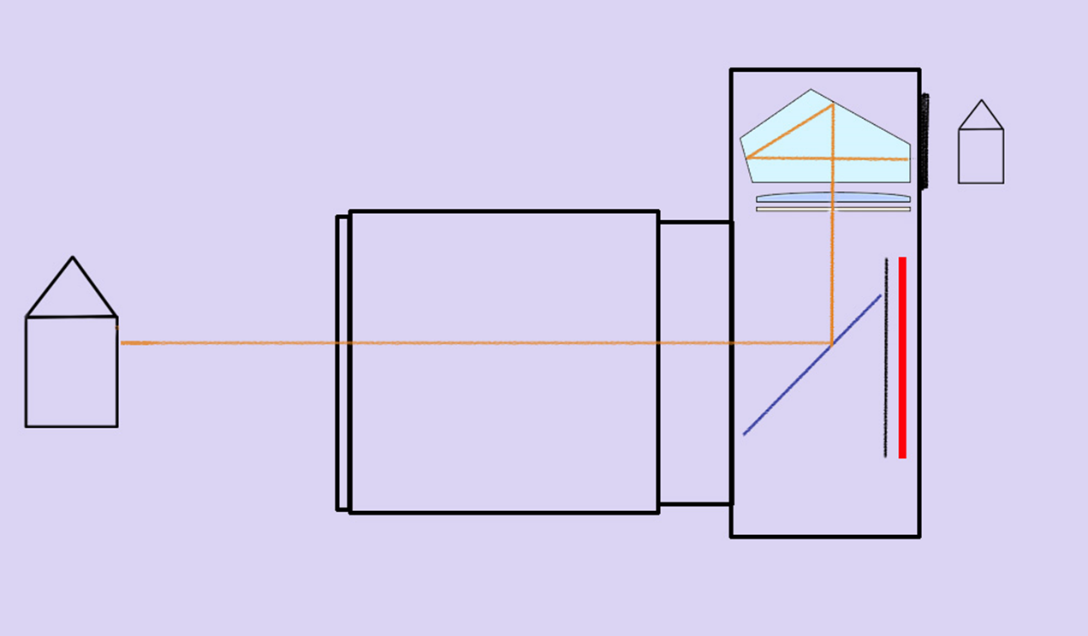
DSLR
The Digital Single Lens Reflex (DSLR) cameras are modeled after the generation of 35mm SLR film cameras.
With this design, light passes through the lens and onto a mirror, reflecting the image onto a prism and then through the optical viewfinder eyepiece. Because the mirror is in front of the sensor (or film), it must flip up and get out of the way during each exposure.
This movement creates a bit of noise and a degree of vibration as the mirror goes up and back down.
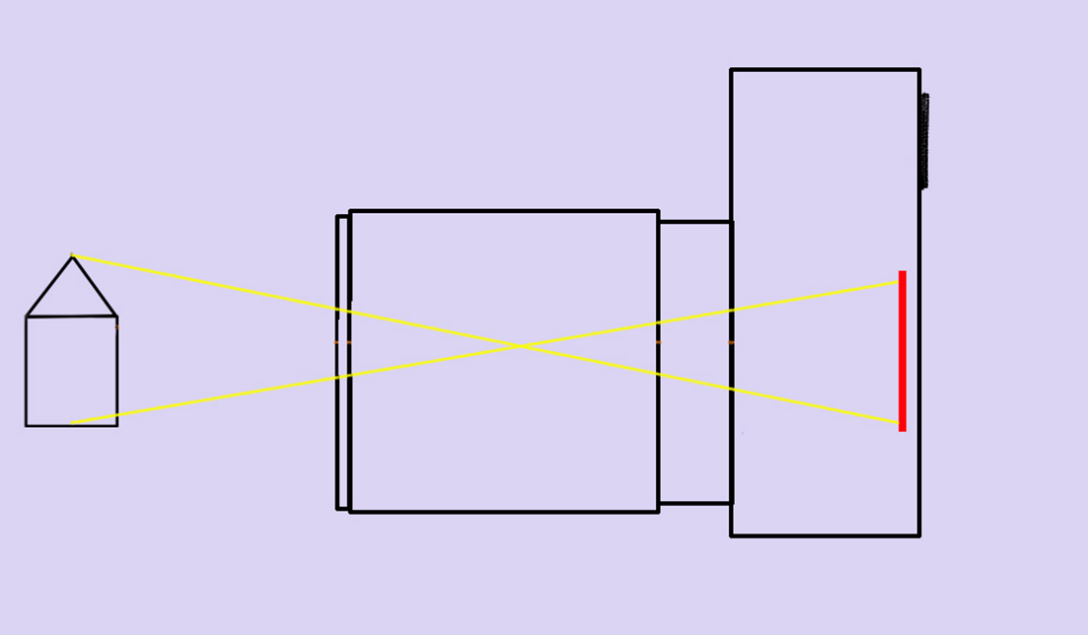 Mirrorless Cameras
The light passes through the lens directly onto the camera sensor with a mirrorless camera. This provides a live preview image directly to the rear screen or an electronic viewfinder.
Because you are viewing the image live, you see the image exactly as the camera sees the image and how it will be recorded. Check your manual to see how to activate this feature.
Mirrorless cameras eliminate the bulk and weight of a DSLR by removing the mirror and optical viewfinder. Without the mechanical movement of a mirror, they are also quieter than a DSLR.
Mechanical Shutters and Electronic Shutters
Mirrorless cameras may offer a mechanical shutter, an electronic shutter option, or both.
With the mechanical shutter, two curtains create an even exposure across the sensor when the button is pressed. The physical movement of the shutter limits the upper shutter speeds that can be used.
There are no moving physical elements with an electronic shutter, so it is completely silent. The sensor records data in a series of scans –like how an image is printed in an inkjet printer. This scanning process happens at speeds much faster than is possible with a mechanical shutter. Therefore, the electronic shutter can capture at speeds much quicker than a mechanical shutter.
This scanning process can generate a rolling shutter distortion when capturing subjects in motion or when there is movement from hand-holding the camera. Because the image is being recorded in a series of scans, a moving subject in constant motion does not stay in alignment from the first scan to the last.
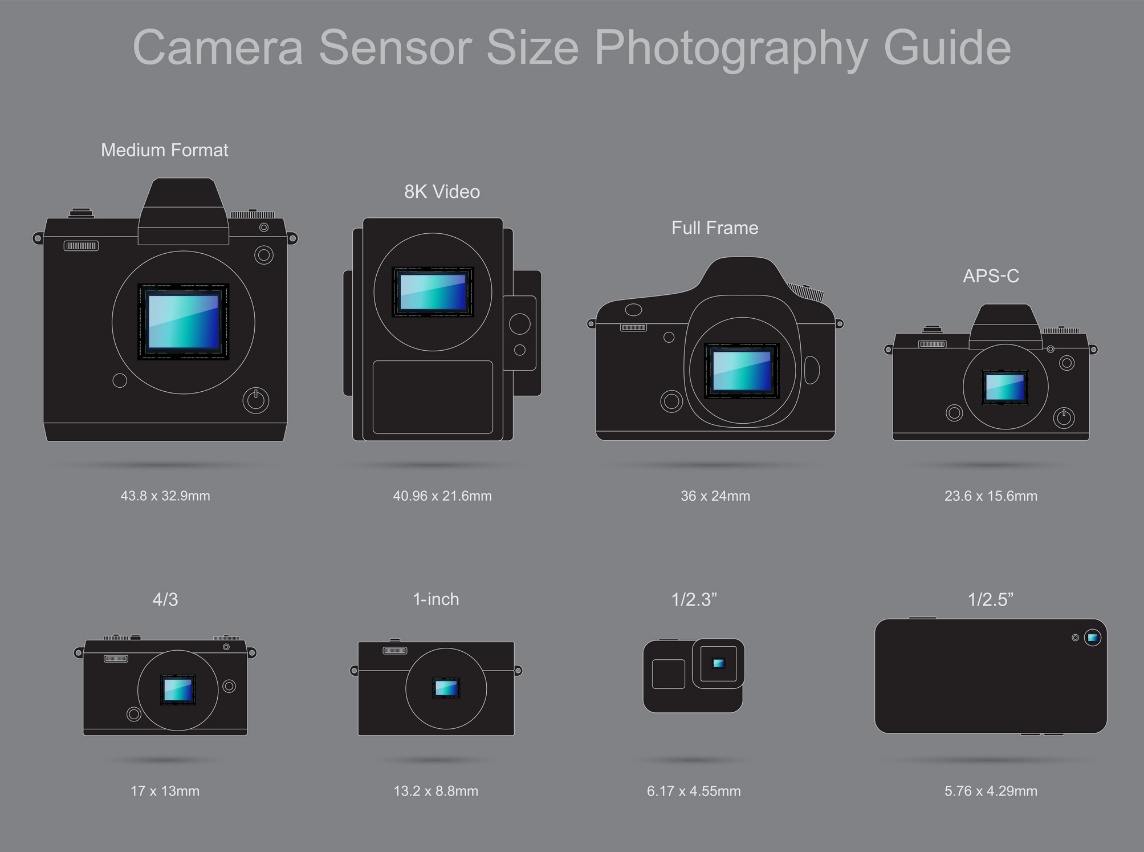
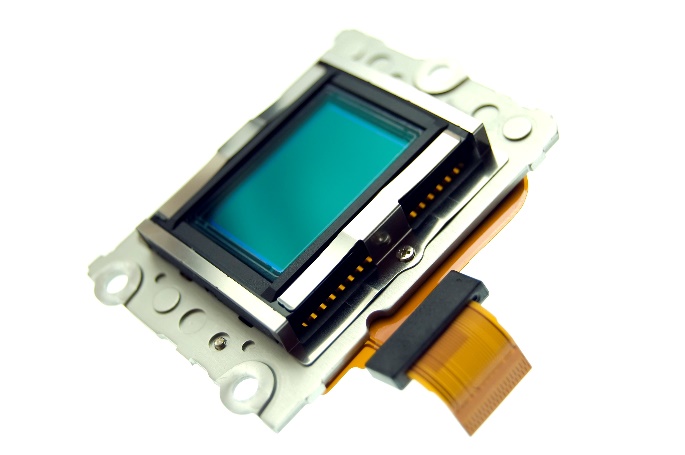
Sensor Size & Quality
In a digital camera, the sensor captures the image data. Sensor size is an essential consideration because it determines the resolution and the quality of the image that will be rendered.
Photographers may be called on to create images for everything from websites to large images that will hang on walls or be used in very large signage. The larger the finished image is to be presented, the larger the native file size should be so that those images can be rendered with appropriate resolution.
Generally, today's digital cameras are manufactured with sensors that can be classified into four size categories: Full Frame, Cropped, Medium Format, and Large Format.
Full Frame Sensors - These are the class of digital SLRs and mirrorless cameras that feature a sensor the same size as the traditional 35mm film frame.
Full frame sensors are well suited for larger wall portraits and 4-color printing for brochures and magazines.
Cropped Sensors - These are the smallest of the sensor sizes and include the most compact point and shoot cameras and many entry-level or prosumer DSLRs and mirrorless cameras. These may also be referred to as APS-C or ASP-H sensors.
Web-only images and smaller photographic prints and albums can be easily handled with cropped sensor cameras.
 Medium Format - This category is represented by those cameras that utilize a sensor larger than full-frame 35mm and smaller than 4x5 inches.
These sensors are sized according to traditional medium format film sizes and include sensors that are 6cm x 6cm, 6cm x 7cm, and 6cm x 4.5cm.
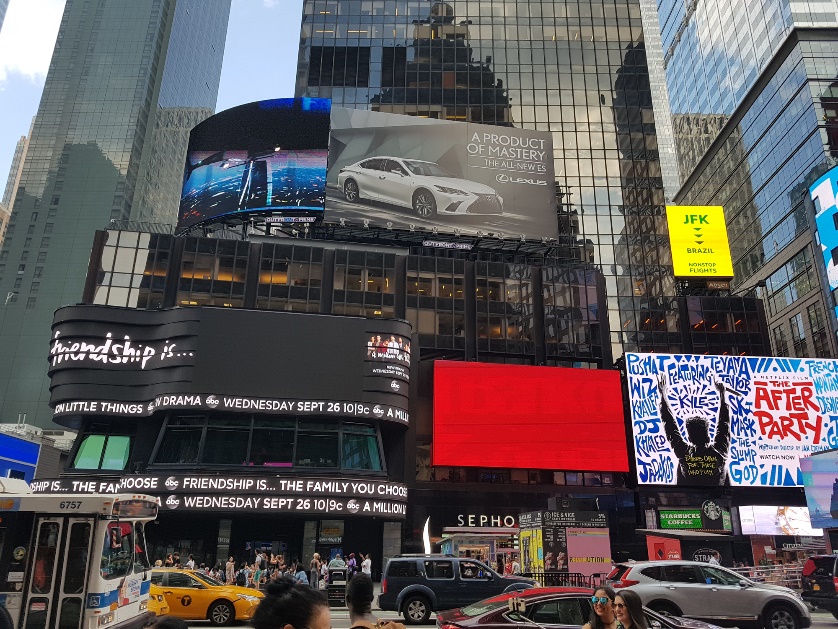
These cameras are ideal for high-end, large-format printing and more demanding 4-color printing jobs of commercial images for trade shows, posters, and billboards.
Large Format - These cameras capture images with either film or a digital sensor that is 4 x 5 inches or larger. They are used for jobs requiring very large prints or graphics with very fine detail. For example, a commercial client wishing to place 10ft x 20ft images in airports for a line of fine watches may require the detail and sharpness that can only be captured by large format sensors.
Sensor Types
The two most common sensor types in today's digital cameras are CMOS (complementary metal-oxide semiconductor) and CCD (charge-coupled device) sensors. Both sensors convert light into electrons, but they have their unique characteristics.
CMOS
CMOS sensors are used in most of today's full-frame and cropped digital cameras. Traditionally, they are of lower quality, lower resolution, and lower sensitivity than CCDs; however, technical advances have improved them greatly. They are generally used to help keep camera costs down because they have excellent battery life.
· CMOS sensors may be more susceptible to noise.
· The light sensitivity of a CMOS chip tends to be lower.
· CMOS traditionally consumes little power.
CCD
CCD sensors tend to be used in high-end medium format, large format, and video cameras that focus on high-quality images with high pixel counts and excellent light sensitivity.
· CCD sensors create high-quality, low-noise images.
· CCDs tend to consume a lot of power—as much as 100 times more power than an
equivalent CMOS sensor.
File Size
Digital images are made up of tiny units known as pixels. The word pixel comes from combining the words "PICture ELement." The number of pixels in a digital image is a product of the camera's sensor. Larger sensors create more pixels and, therefore, higher-resolution images. The higher the resolution, the more detail can be reproduced within the image.
Resolution
Suppose you were asked to draw a picture of a face using only dots. If you were only allowed 1,00 dots, your picture would not have a lot of detail—especially in highly defined areas such as the eyes. If you could use 1,000,000 dots instead, your drawing would have much more detail and be better defined. The difference is that having 999,900 more dots gives your drawing much more resolution.
The number of pixels per inch defines the resolution of any digital image. Since digital images comprise these tiny points (pixels), images with a higher pixel count per inch provide more detail than images with fewer pixels per inch.
A megapixel is one million pixels. A camera that generates a 16-megapixel file will have a higher resolution than a camera that produces a 4-megapixel file because it has 12,000,000 more pixels to use in rendering the image.
Let's look at a few generalities of file sizes:
· Higher megapixel files will produce higher quality images than lower megapixel files.
· Larger images benefit from larger file sizes because there is less decline in quality.
· Images that a 4-color press will print generally benefit from larger file sizes.
· Smaller images do not require really large files to produce acceptable quality.
· Images for the web do not require large file sizes.
Bit
A bit is a single unit of digital information that can generate two values (0 or 1).
With two bits (2x2), four distinct values can be generated: (0-0, 0-1, 1-0 or 1-1).
Byte
A byte consists of 8 bits. Eight bits is 28 (2x2x2x2x2x2x2x2) and creates 256 values. So, in digital imaging, 8 bits generate 256 tonal values. Twelve bits generate 4096 tonal values.
Bit Depth
Bit Depth (bits per pixel) is the precision to which a pixel can specify color. For example, a sensor that records 8-bit values for Red, 8 bits for Green, and 8 bits for Blue (RGB) means 256 possible values for each red, green, and blue channel.
When you multiply that out (256x256x256), the sensor can create 16,777,216 color values at 8-bit depth.
JPGs render color at 8 bits per color. This means when you use your camera in JPG mode, your camera processes the file with up to 16.7 million colors.
In RAW format, cameras usually capture each color in 12 or 14 bits or more. Increasing the bit depth dramatically increases the size of the file and the number of colors (billions) the camera can capture.
For example, a camera capturing a 12-bit RAW file can generate 68.7 billion colors - far outperforming the JPG capture. RAW capture gives the photographer much more latitude for color adjustments than JPG capture.
Of course, RAW capture requires the photographer to make editing decisions that the camera would have done in JPG mode. While RAW capture does create this extra step to process the images, the benefits cannot be understated.
Resolution (sensor size) and bit depth (JPG / RAW) determine the total file size.
Dynamic Range
One of the considerations in selecting a camera is the dynamic range of the sensor. The dynamic range represents the camera's ability to record a scene's darkest and lightest values with detail. The wider the dynamic range, the more distinct the separation of the darkest and lightest values.
The dynamic range is the ratio between the lightest (highest) and darkest (lowest) values. (lightest values/darkest values)
Regarding the perception of these values, camera sensors, computer monitors, printers, photographic prints, and even our eyes have their unique dynamic range.
- The human eye can see approximately 21 stops of dynamic range.
- The dynamic range of today's higher-end digital cameras is 12-15 stops at 100 ISO. Higher ISOs tend to reduce the dynamic range.
- Standard RGB monitors have about an 8-stop dynamic range, while HDR monitors have about a 10-stop dynamic range.
- Standard papers for photographic printing have a 5-6 stop dynamic range.
The eye can see detail in very dark and very bright scenes, but the camera cannot capture that same full range of detail. The dynamic range that the camera can capture is further reduced when the image is viewed on a monitor. The dynamic range seen on a monitor cannot be reproduced and printed on paper.
The Value of Proper Exposure
When the dynamic range of a scene exceeds the recordable dynamic range of the camera sensor, detail may be lost in the shadows or highlights.
Overexposure will cause a loss of highlight detail. You may be able to see subtle variations of tones and texture in a white wedding dress, but if you overexpose, the slight variations become a few shades of white without any detail. In other words, you have blown out the highlights.
You may see subtle variations of tones in a black dress. But if you underexpose, the subtle variations of tone and texture become a few shades of black with no detail. You have blocked up the shadows.
Over and under-exposure problems are magnified as you attempt to prepare images for viewing on digital displays and in print.
This is why proper exposure is essential.
File Size and File Formats
The file type and size created when the shutter is pressed are controlled by “Quality" settings inside the camera's menu. The choices made here profoundly impact the quality and size of the finished image that can be produced from that file.
Capturing in JPG Mode
With a camera set to capture in this mode, the image is processed by the camera and written into a JPG file as a part of the image capture process.
JPGs that are processed in the camera undergo a series of universal adjustments to contrast, sharpness, color space, and more according to the camera settings.
A JPG file is a compressed image file. Much of the original data for the image processed by the camera during image capture is discarded and lost when the file is compressed into a smaller size.
A JPG is known as a LOSSY file because data is lost during the compression process. During JPG compression, almost 75% of the image data is discarded to save space.
JPG compression usually allows three quality options:
Low-Quality JPG - Low-resolution files suitable for use in e-mail and website applications
Medium Quality JPG - Medium resolutions files suited to website applications and printing very small prints
High-Quality JPG - Larger resolution files intended for printing larger wall photographs and smaller images reproduced in 4-color press processes and magazines.
The result of capturing in JPG mode is that the JPG file does not provide as much latitude for subsequent post-image editing adjustments. Because of the compression, JPGs are also prone to image artifacts (digital noise).
RAW + JPG
Many cameras offer a RAW + JPG capture, which creates both file types during exposure. This can be helpful in cases where quick access to the image file (JPG) is required, but more detailed processing and image preservation (RAW) are desired in the long run.
This combination increases the amount of storage space utilized on the camera's digital storage media.
RAW
RAW files contain unprocessed data captured by the sensor. This data includes image metadata as well as pixel data. The key here is that a RAW file is not an image file. It is a data file that contains information gathered by the sensor. It is akin to a traditional negative in that all the image data is contained within the RAW file.
RAW files must be converted or processed into image files. Part of this processing may include adjustments to exposure, white balance, tonal ranges, noise reduction and sharpening, and more. This conversion can be done in any number of software environments. After adjustments have been made, the software will export the RAW file into the final image files, including JPGs, TIFFs, and more.
The adjustments to RAW files do not change the RAW files themselves. These adjustments are logged and stored in a companion or sidecar file created and linked to the RAW file when edited. These files provide the instructions generated for the changes to be applied to the RAW file when it is accessed in the image editing software.
Because there is no compression at image capture and no changes to the RAW file during image editing, it is a LOSSLESS file in that there is no data loss when the file is accessed and then saved or exported.
While the file remains untouched, endless changes can be made to the sidecar files as the photographer chooses countless options for finishing the image. As each interpretation is completed, a new image file can be generated and exported.
Capturing images in RAW format provides you with the entire amount of data your camera can record. In other words, a 20 MP camera will provide 100% of the data recorded at image capture. This is because no internal processing or compression takes place when shooting in JPG mode.
Preserving this full range of digital data provides a broader range of image corrections for exposure, white balance, contrast, saturation, sharpening, and more.