Module 2D: Types of Lighting
D. Types of Lighting
Lighting
Photographers are called upon to photograph everything from people to products and from landscapes to real estate. When it comes to creating great images of such a variety of subjects, lighting is key.
Photographers will need to be in command of a full arsenal of lighting tools and techniques. From hard light to soft, from flat light to directional, from studio lighting to natural sunlight, there are many decisions that go into the lighting tools that will be used and the placement of those tools to obtain a desired effect and to overcome obstacles.
Main Light
Whether the main light is an artificial source or a natural light source, its first job is to illuminate the subject. The main light can be used to create flat lighting or directional lighting on the subject.
Flat Lighting
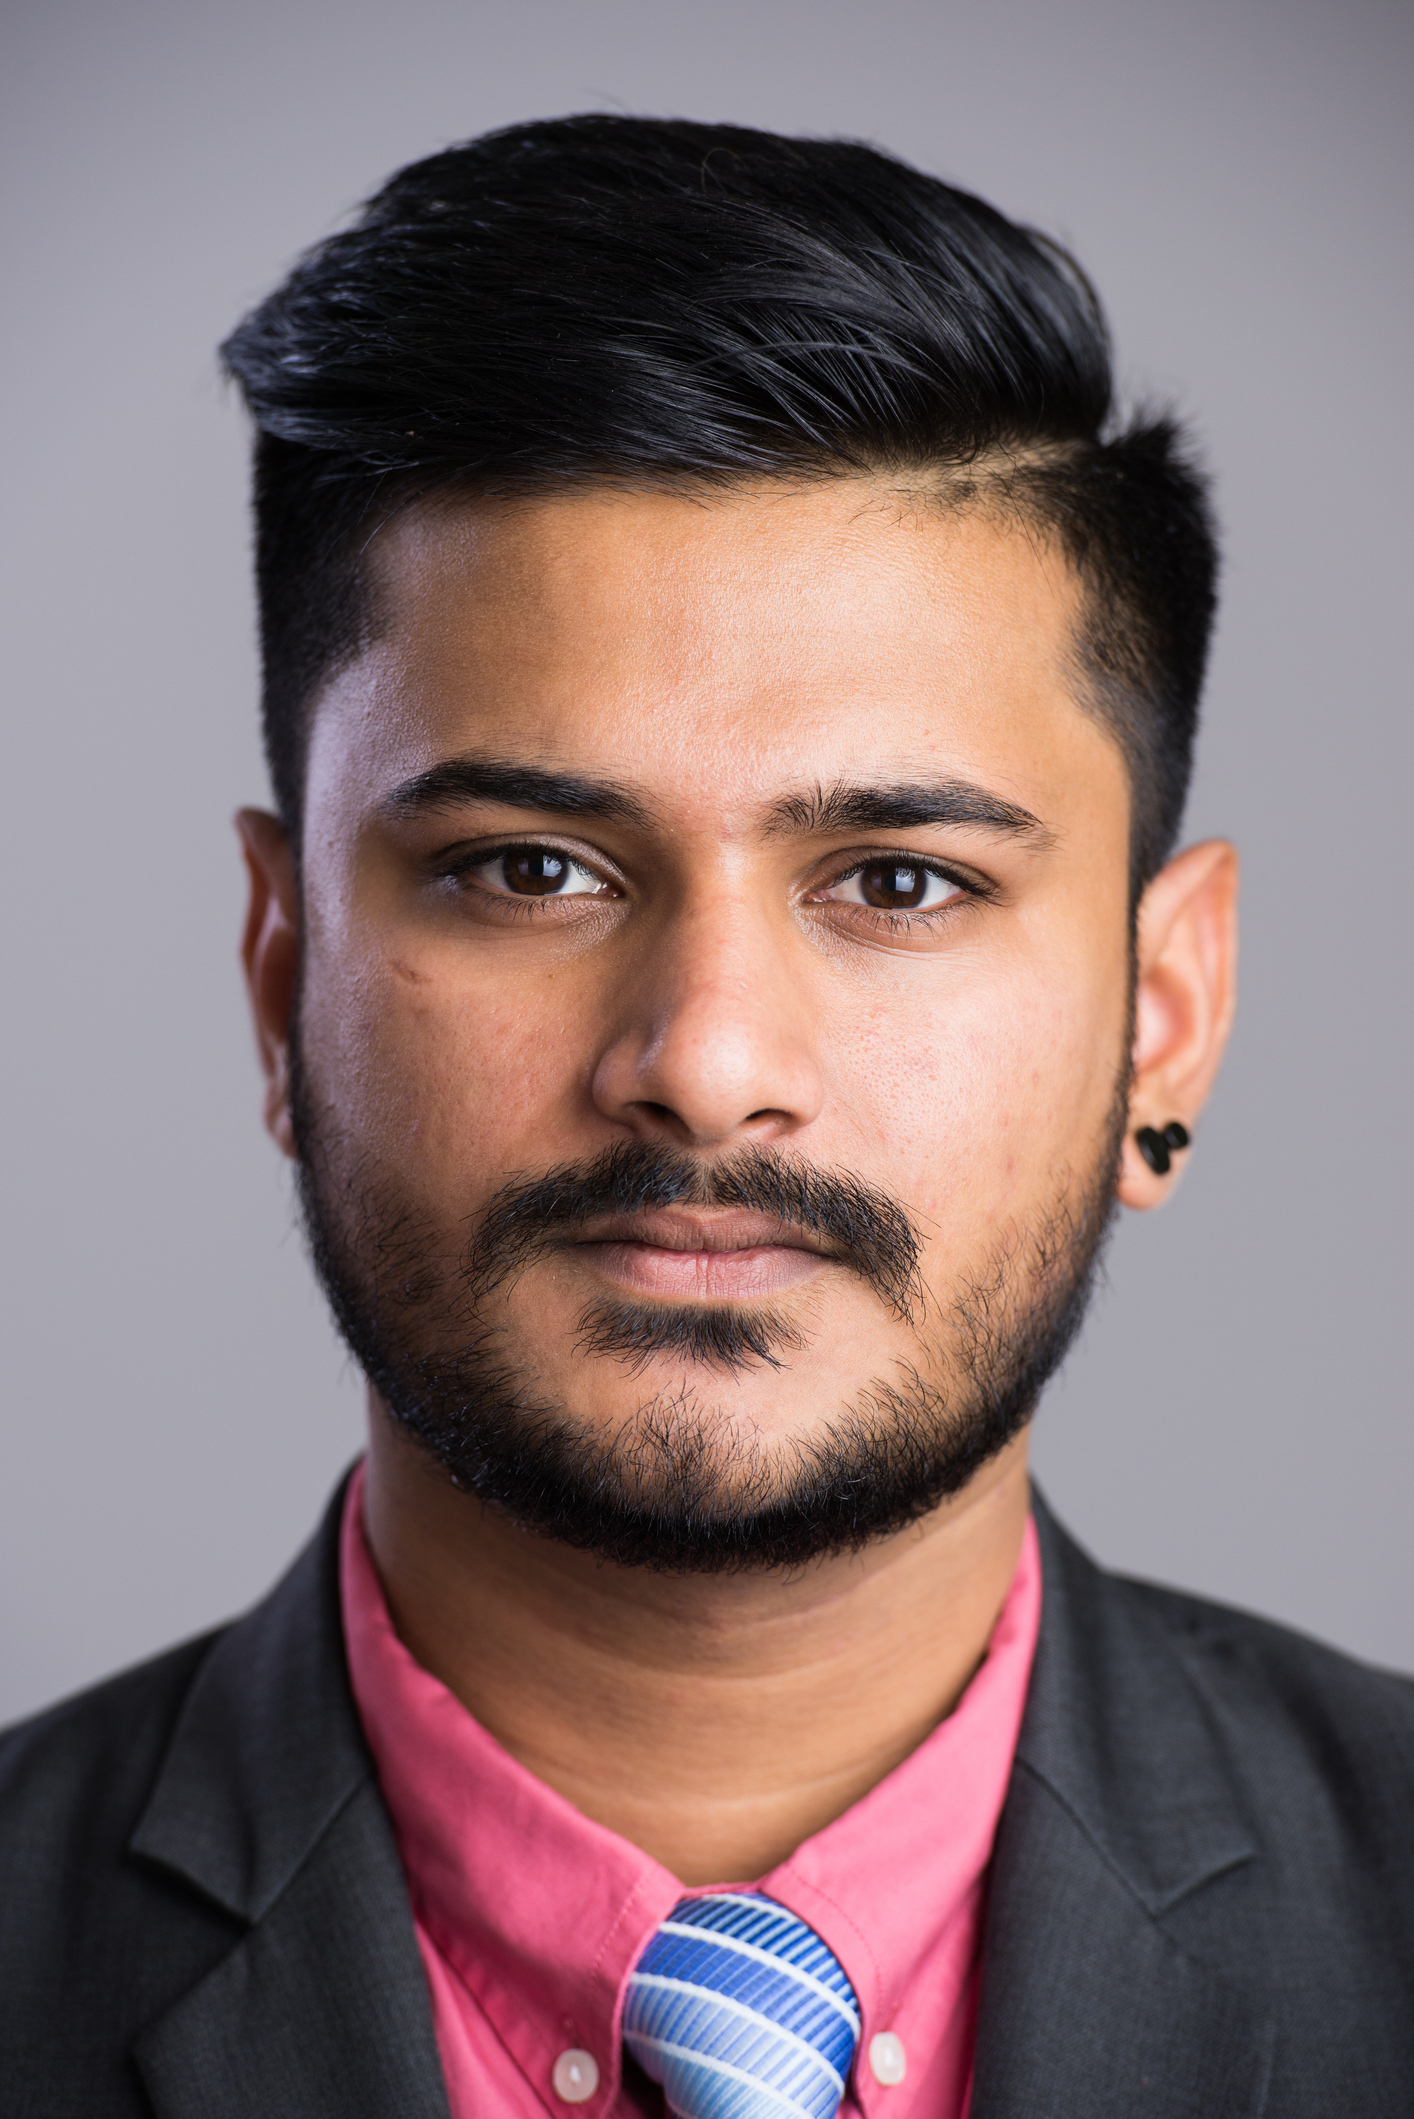
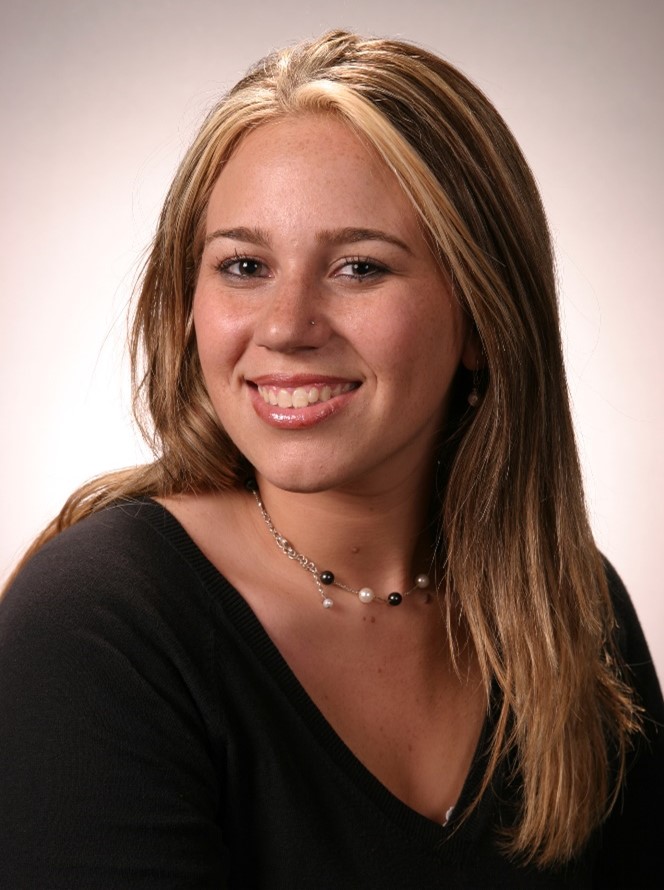
Flat lighting is lighting that strikes the subject straight on from the front with little to no real shadows.
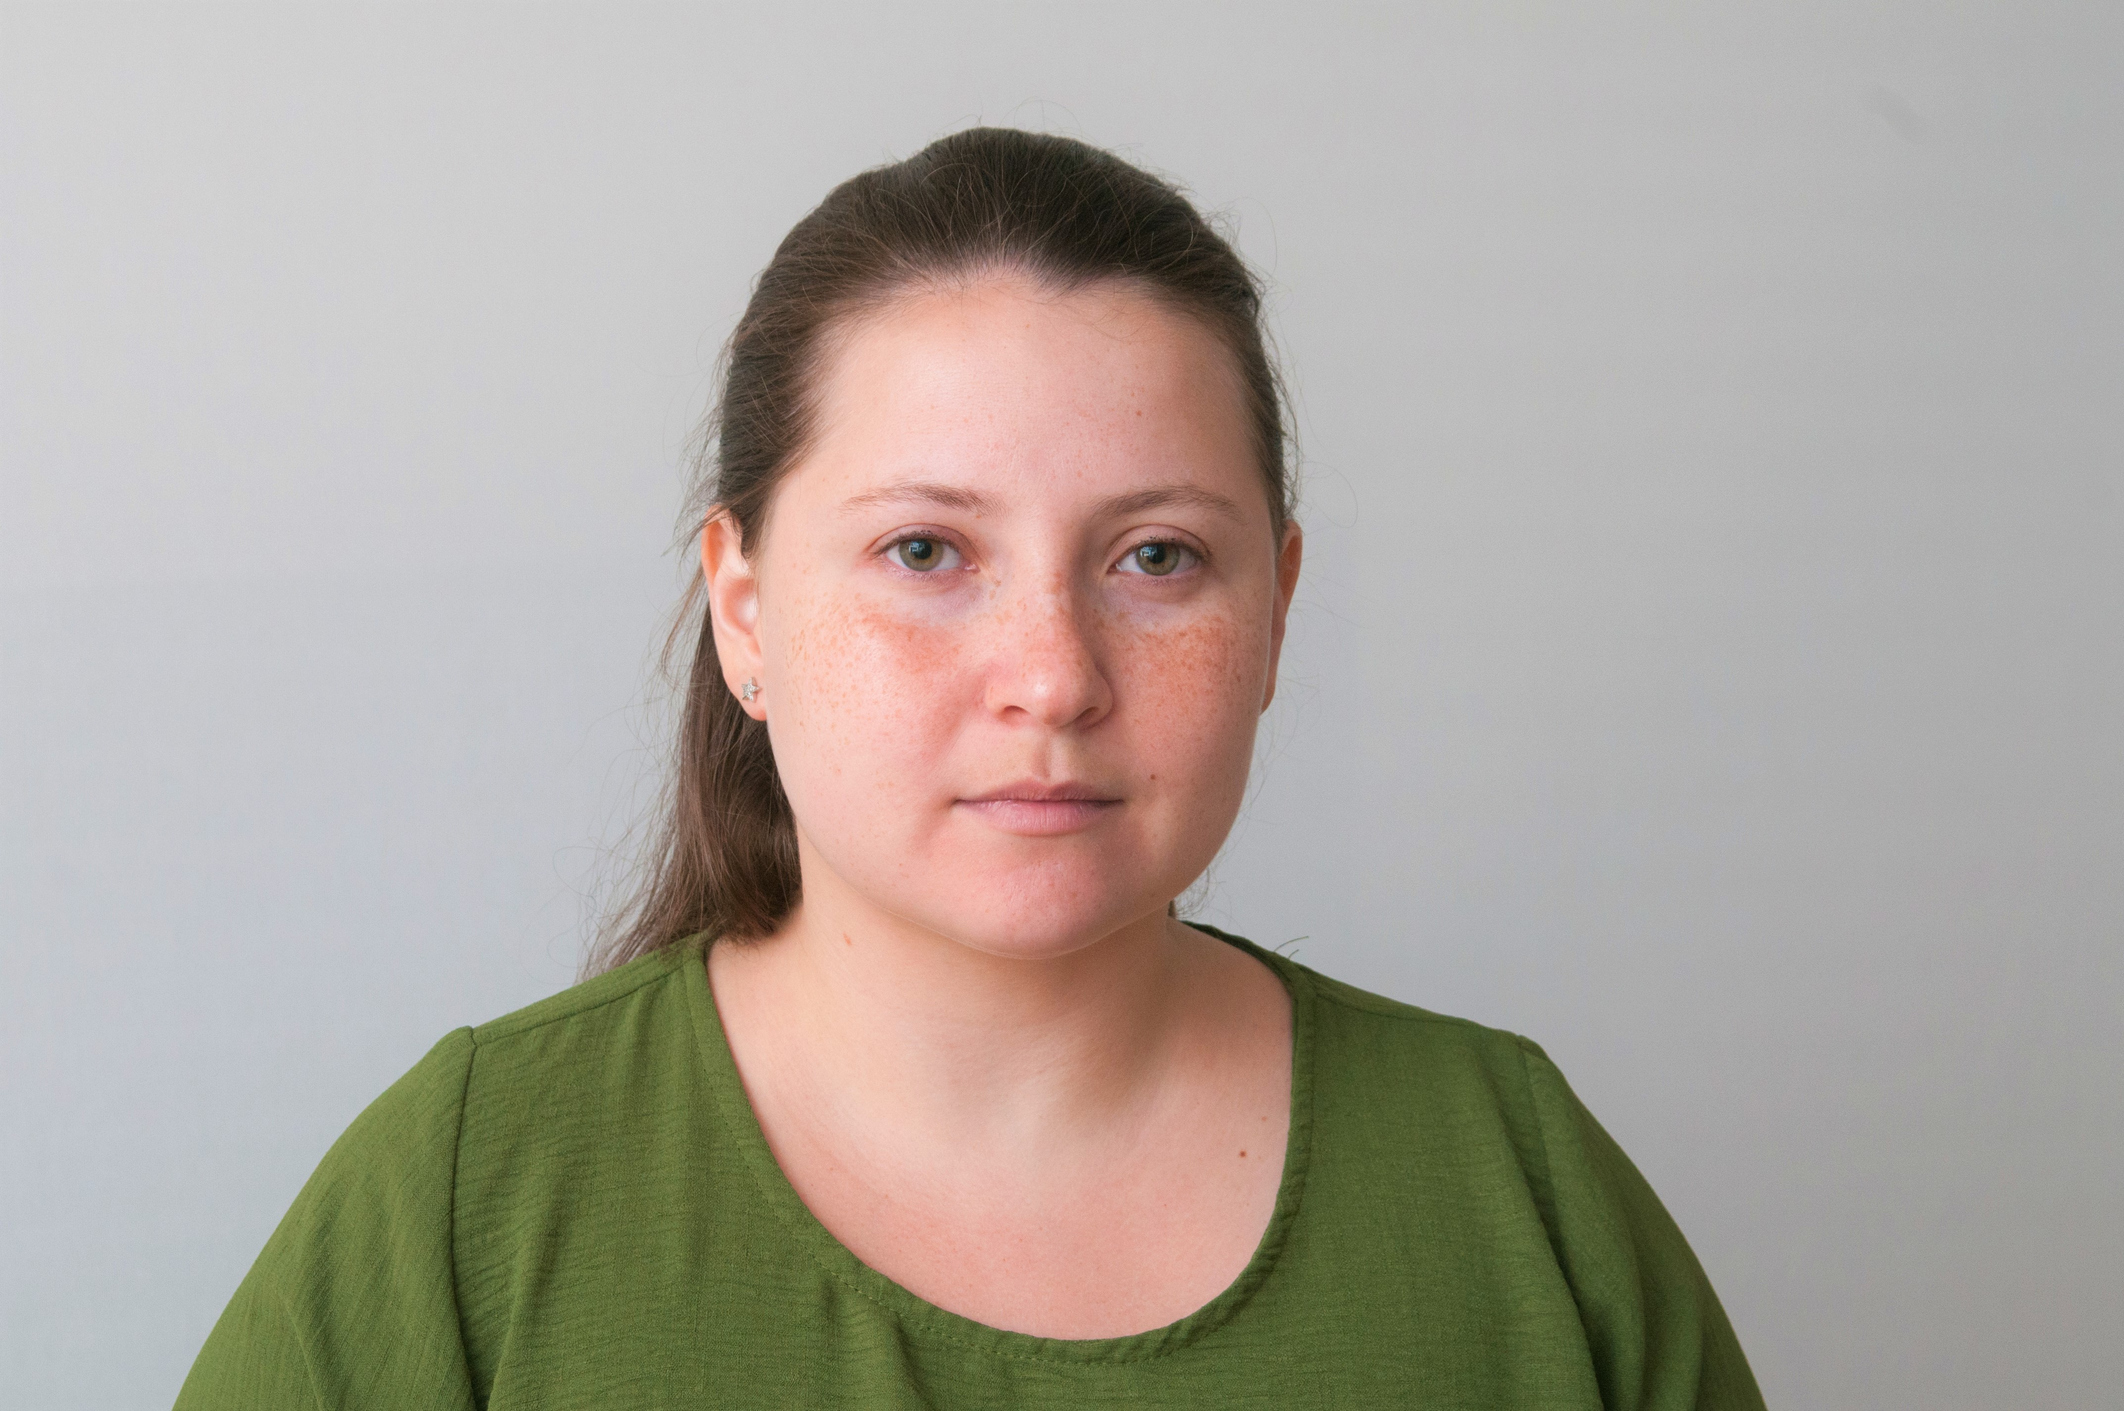
Because flat lighting does not bring out texture, it may be a flattering choice for older clients and those with strong cases of facial blemishes because of its tendency to hide wrinkles and skin imperfections.
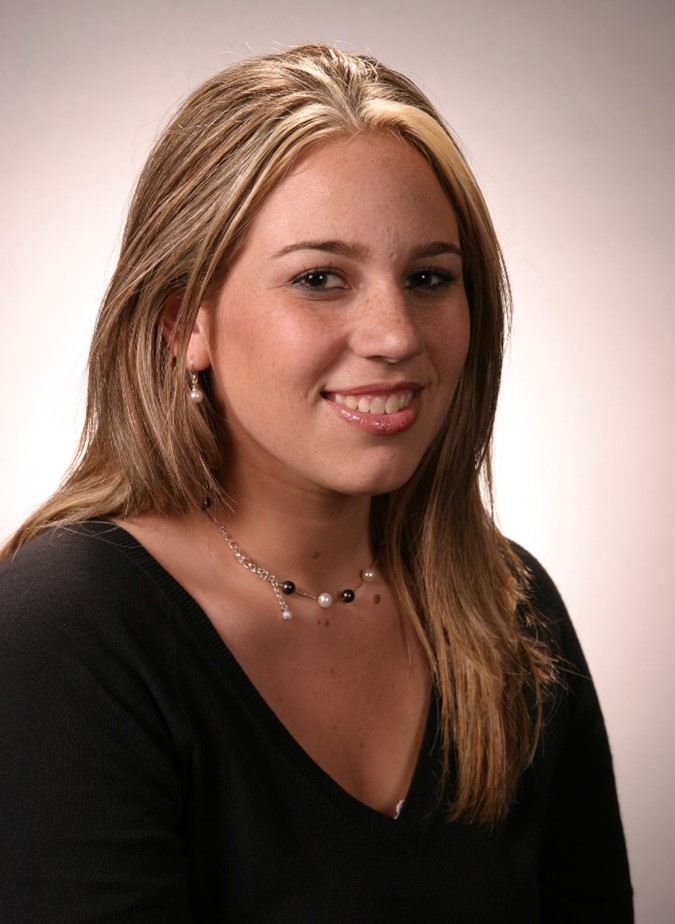
When photographing large groups, flat lighting may be the safest choice to avoid the possibility of creating uncontrolled shadows across the group. (below)
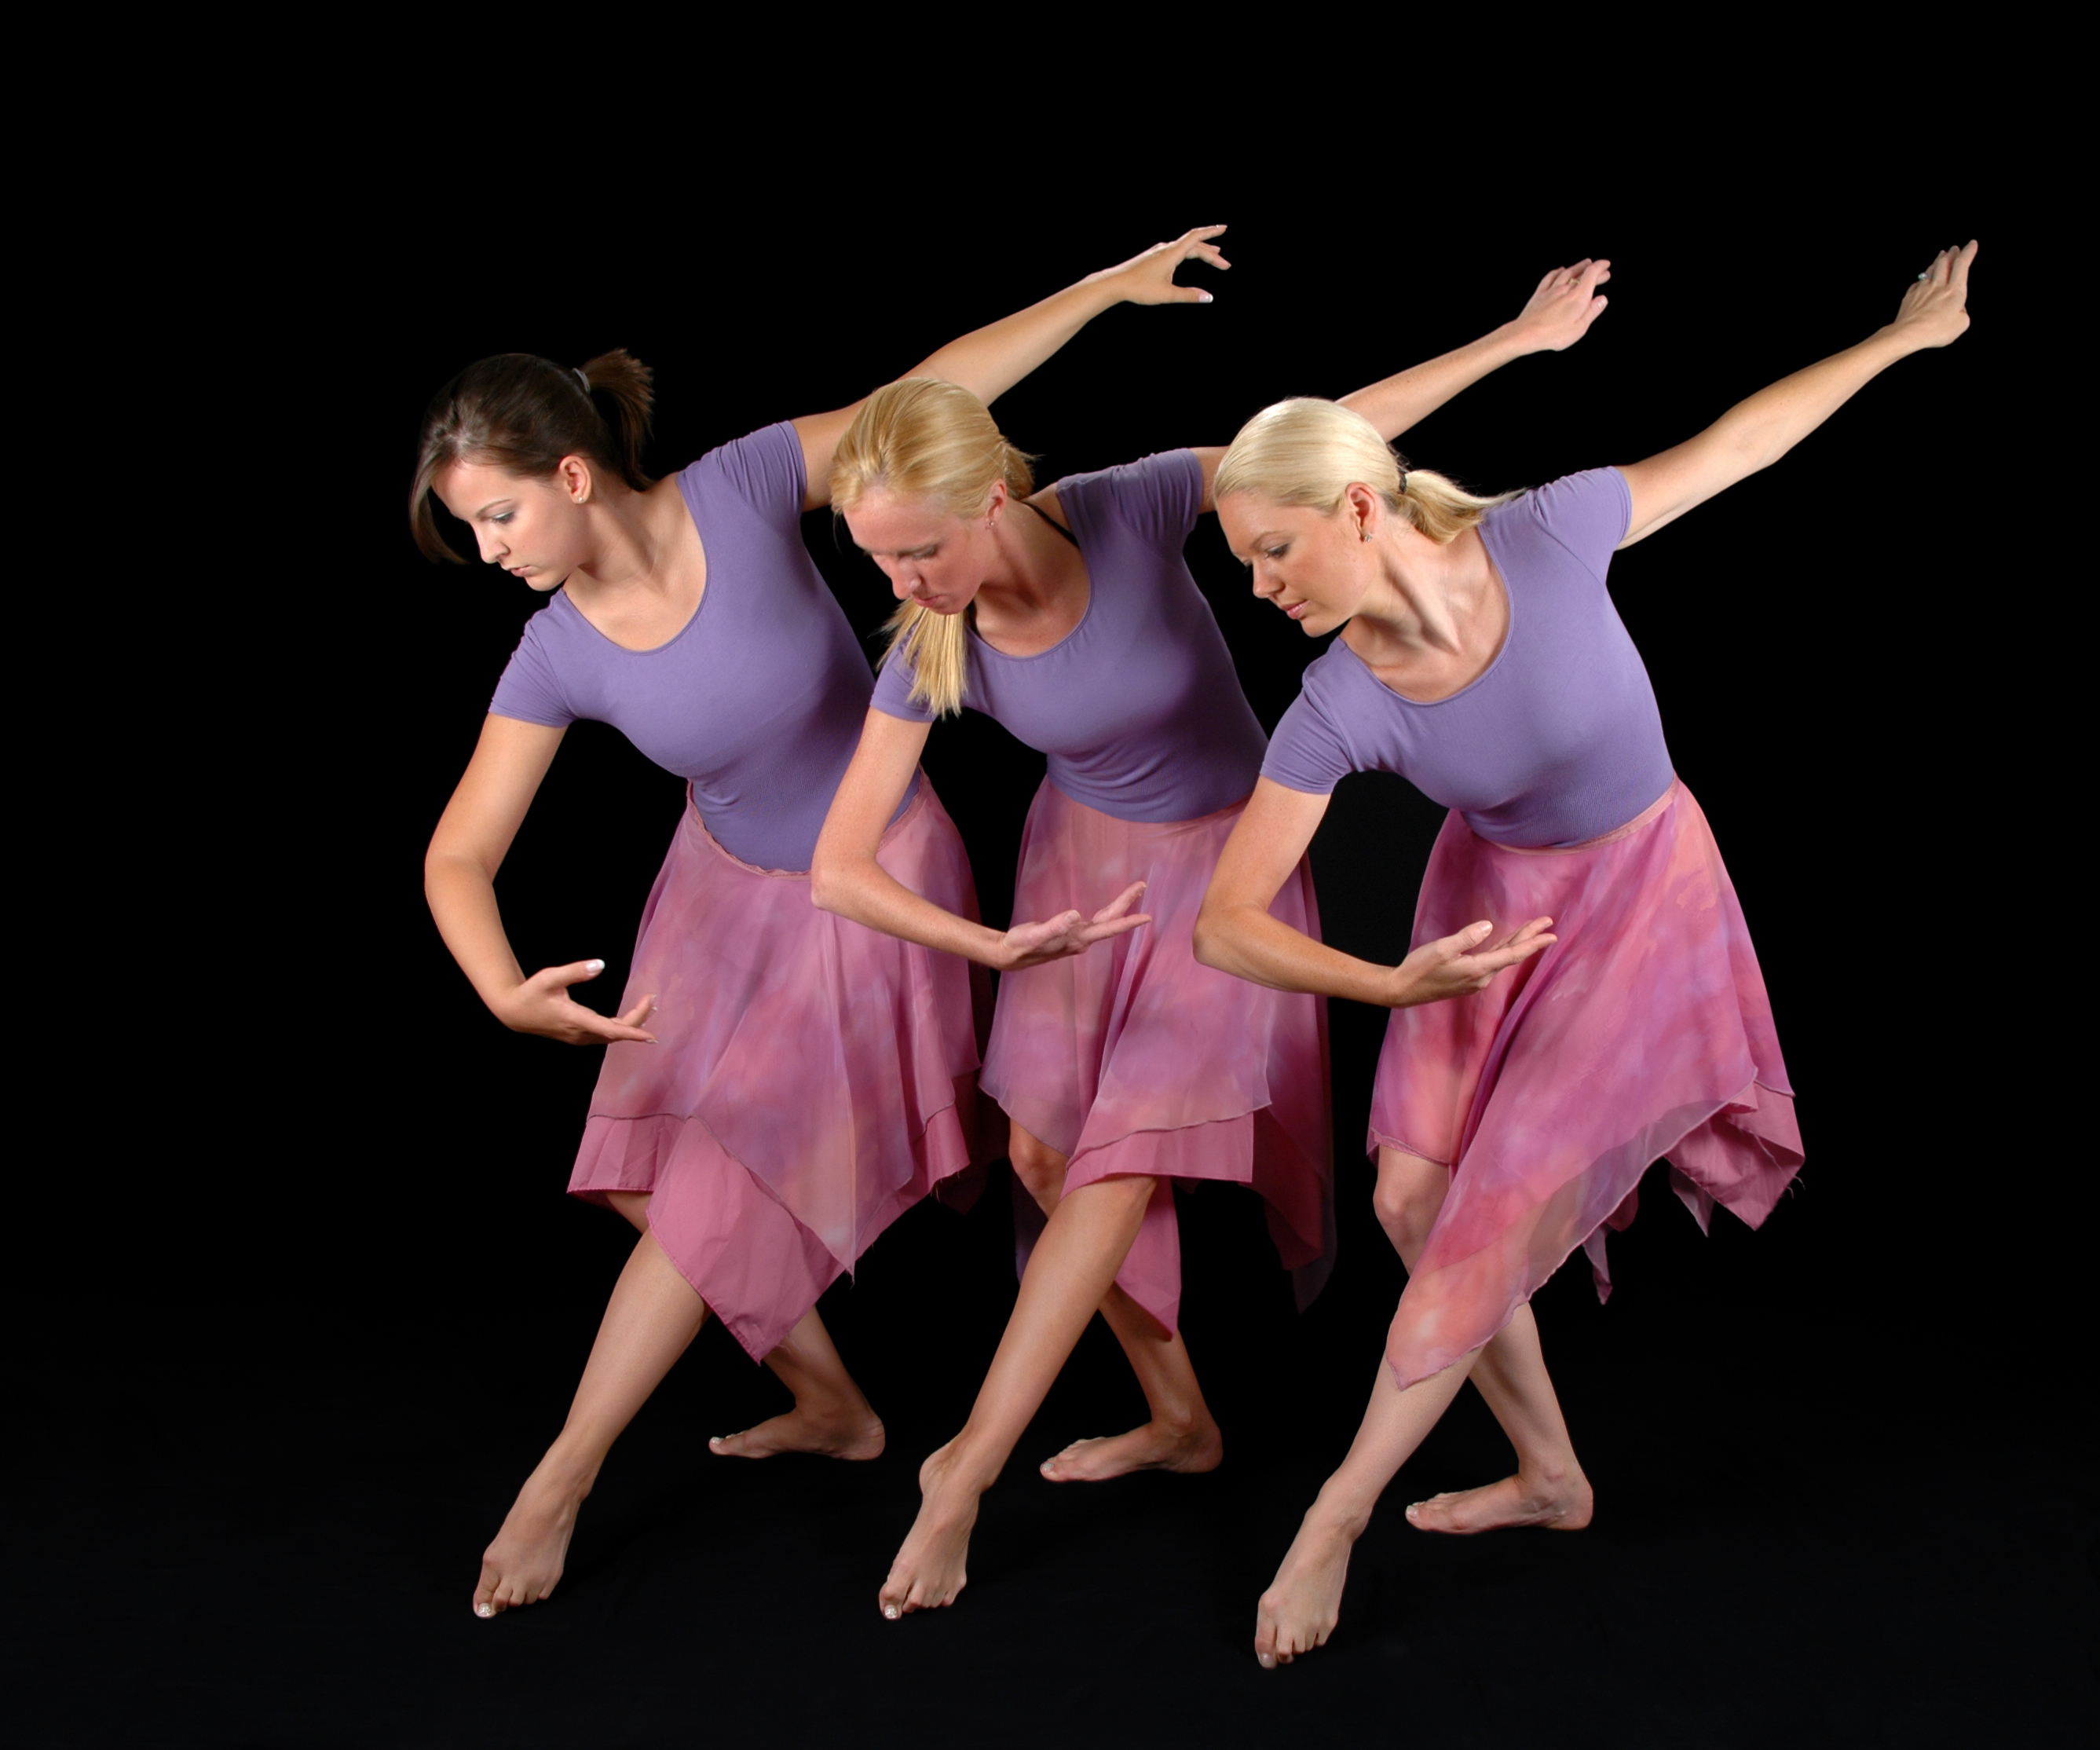
On the image above, one light on each side of the camera at 45° at equal power creates a flat lighting pattern. This helps to reduce the shadows of the raised arms throughout the image.
Directional Lighting
For lighting to be directional, there must be a light side and a shadow side. With a directional lighting pattern, the main light is used to create highlights and shadows in a lighting style and pattern that is desired for the subject.
The main light creates the foundation of the lighting pattern and style that brings out the features of the subject and creates a desirable presentation of the subject.
For a main light to create highlights and shadows, it must be situated in such a way that the light will skim across the surface of the subject to bring out detail. It is the blend of highlights and shadows that give an image depth and definition.
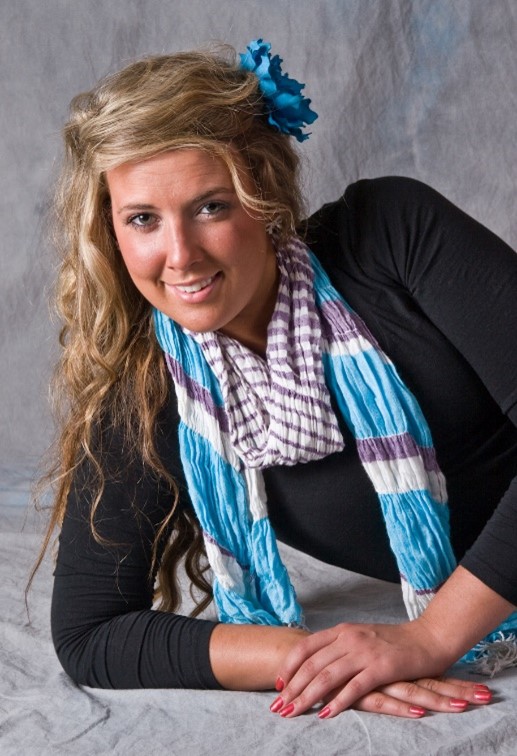
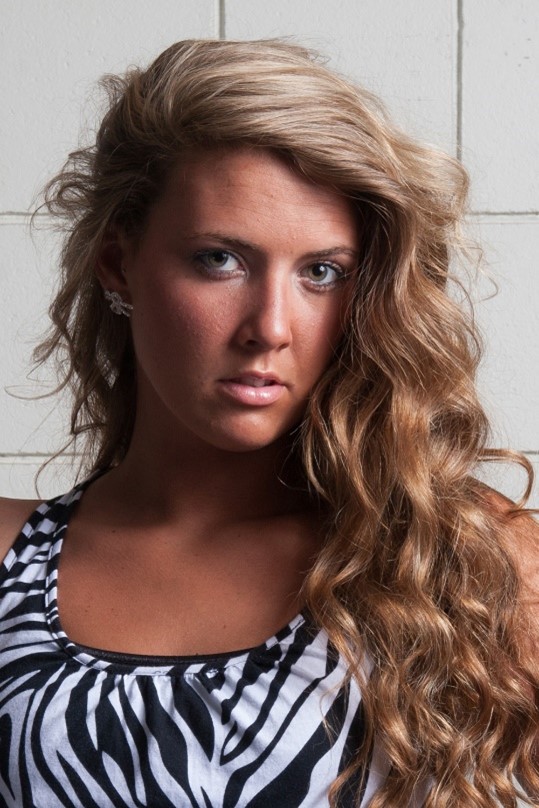
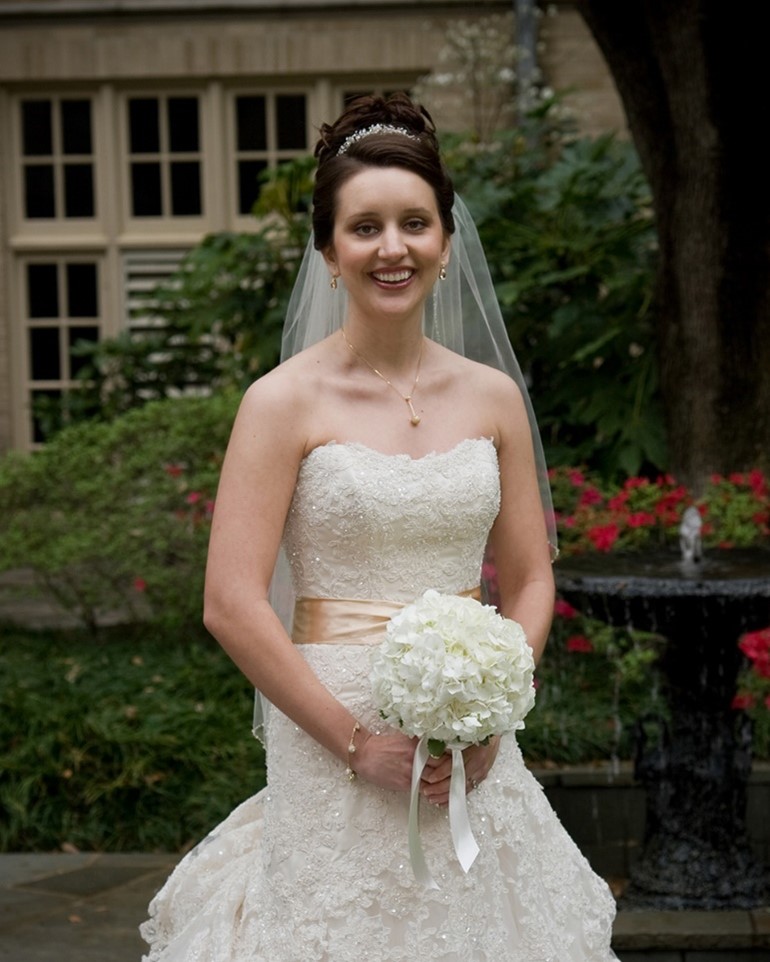
In the image below, the main light is placed at camera right at 45 degrees. Because the subject’s body is turned toward the light source, the main light strikes the subject’s body directly from the front creating a flat lighting pattern on the body, even though there is directional lighting on the face.
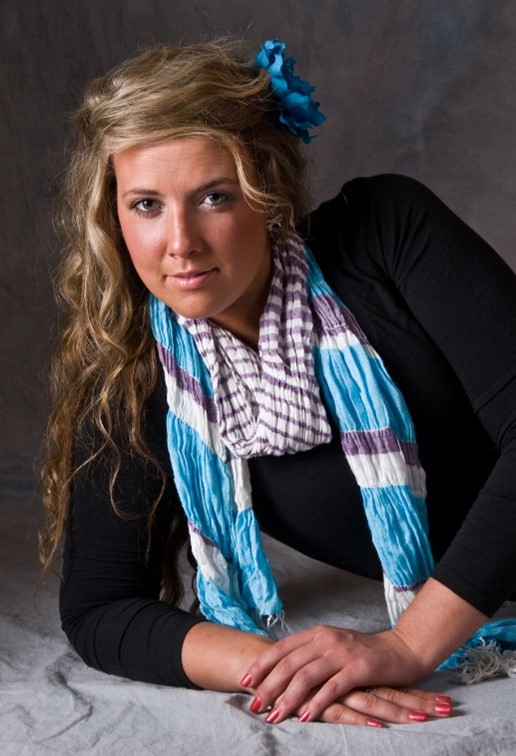
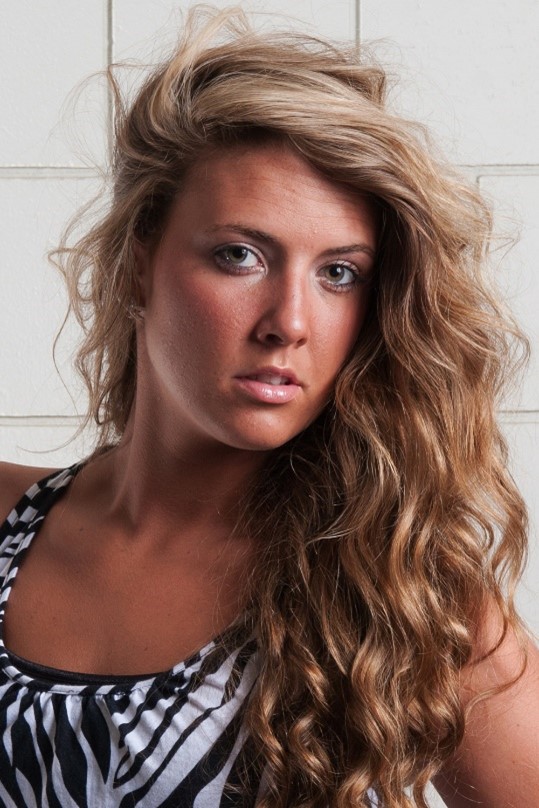
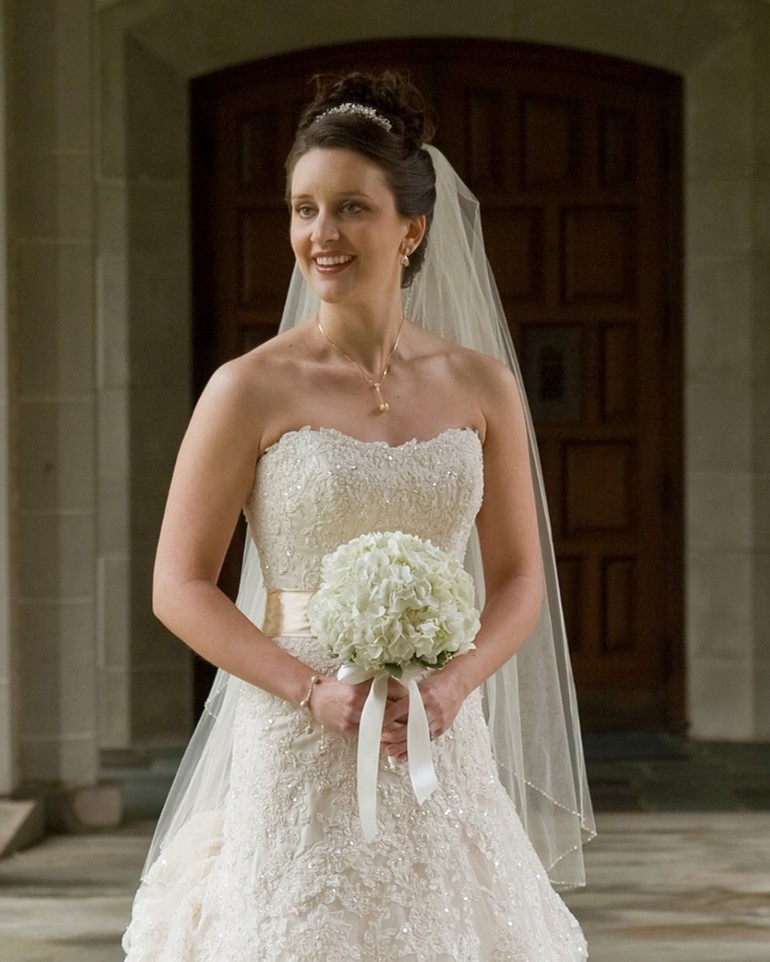
In the image above, the main light is moved to camera left at 45 degrees to achieve directional lighting on the subject’s body. The light now skims across the front of the body creating a highlight side and a shadow side.
When directional lighting is desired, turn the subject’s body slightly away from the light main light.
Catchlights
The reflection of the light source that appears in the subject’s eyes are called, catchlights. In a portrait, catchlights add a desirable touch by bringing life to the eyes. Traditionally, the placement of the main light should be high enough that the catchlight appears at the ten o’clock or two o’clock position in the eyes.

When using multiple light sources, the secondary catchlights are usually removed leaving only the catchlight from the main light source.
The Main Light Creates Contrast
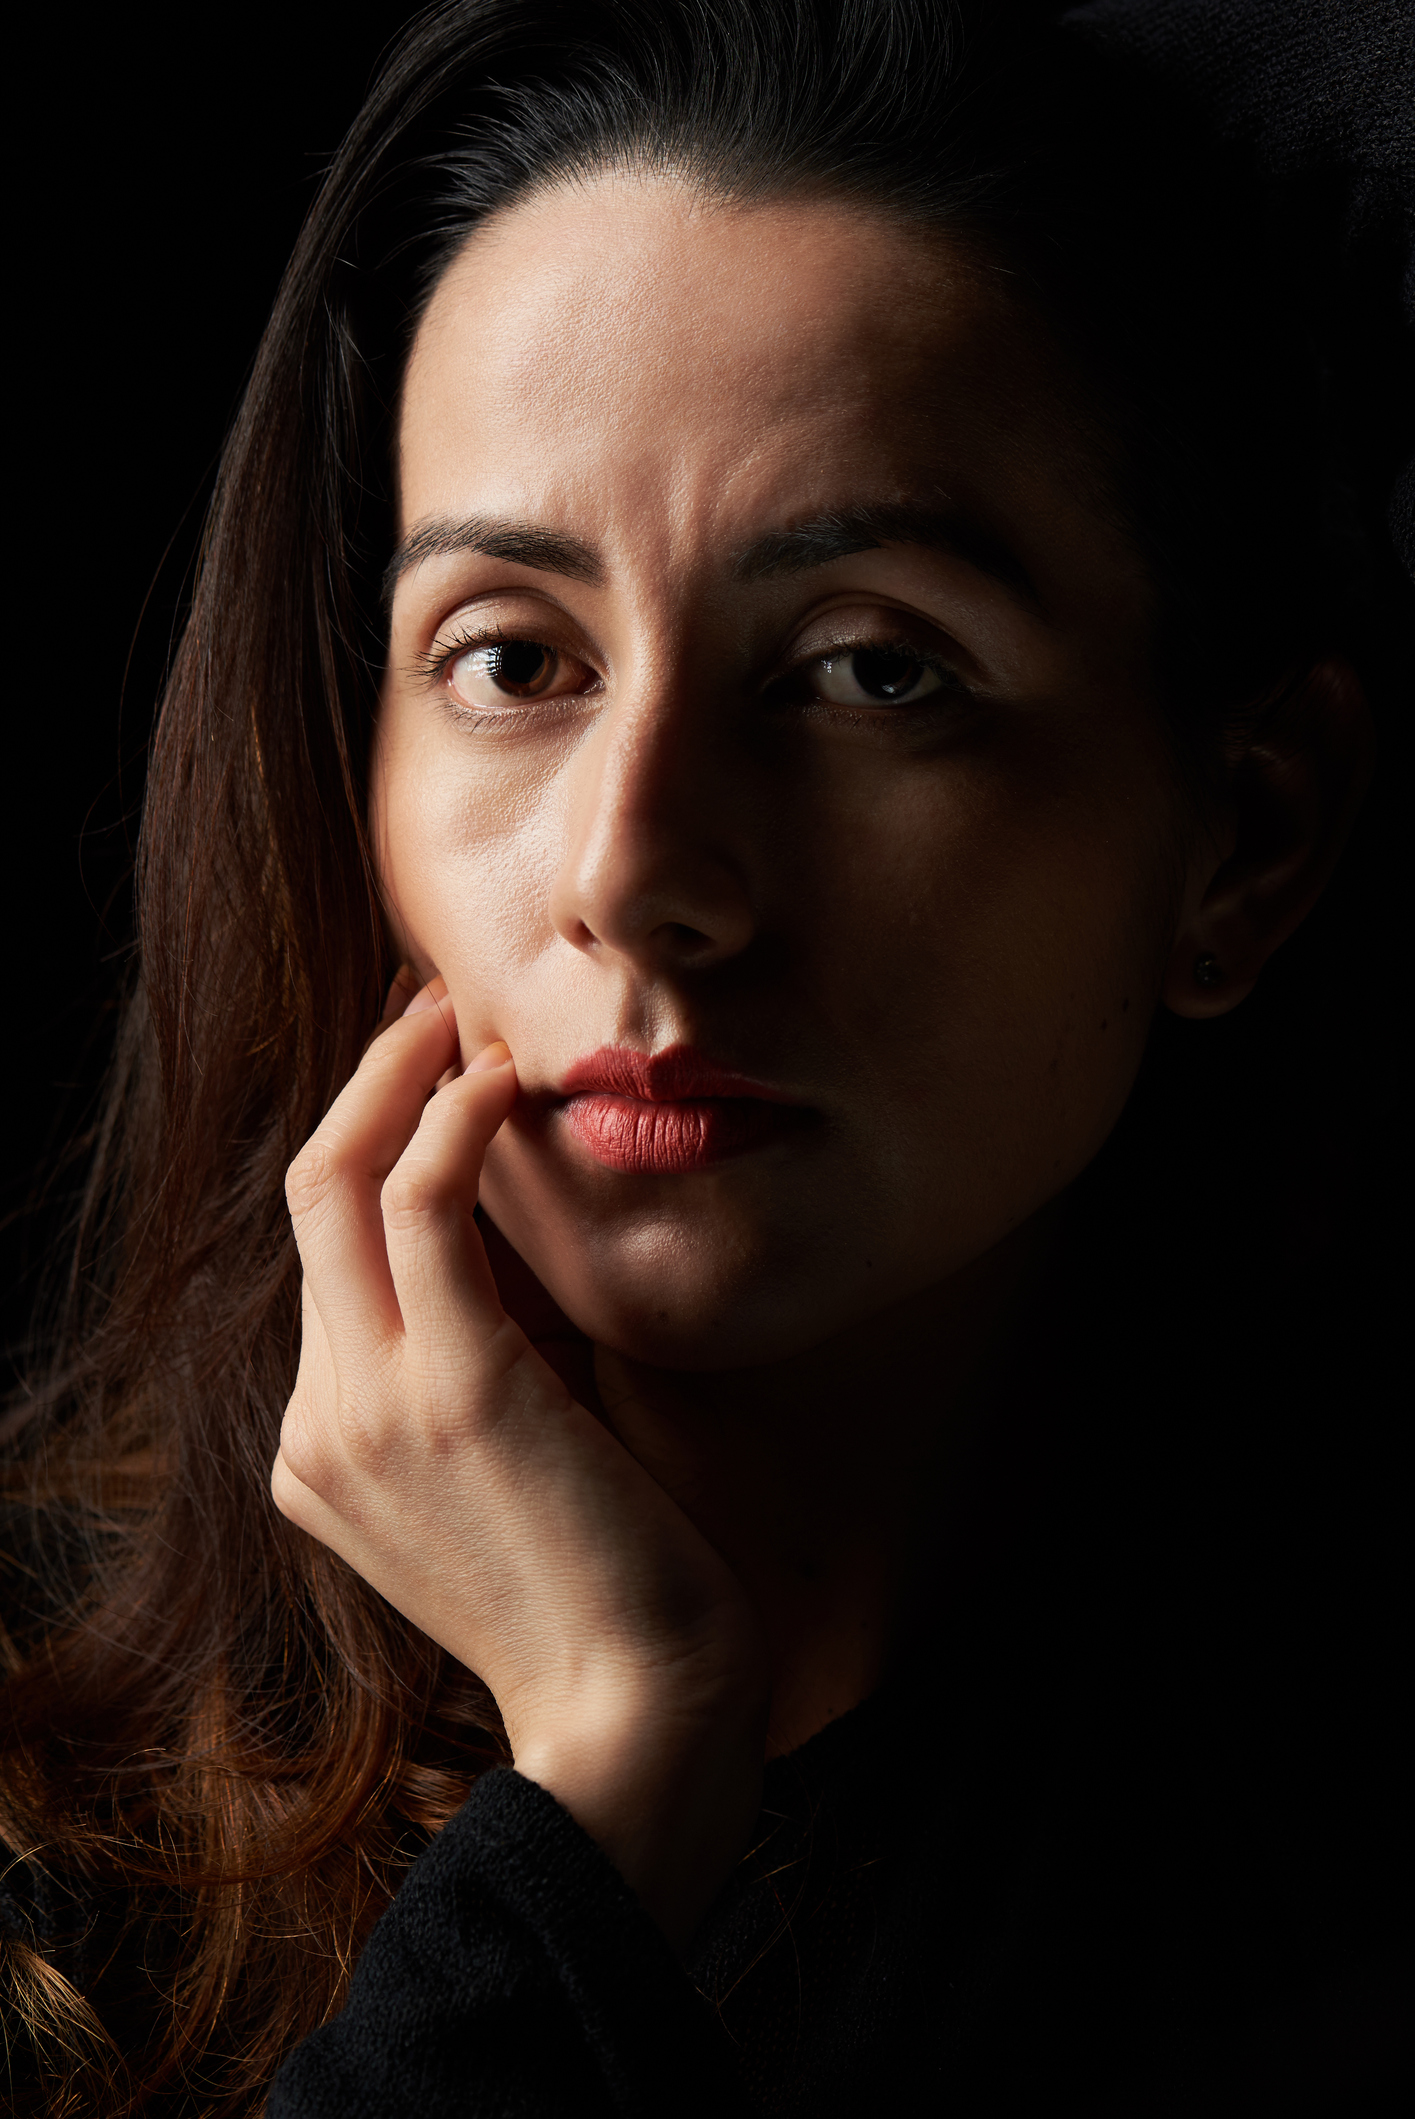
The image at left is illuminated with a single light source. It is placed at 45 degrees so that the light skims across the subject. Notice the change in lighting from shoulder to shoulder where one side is in the light and the other tapers into shadow. This provides form and shape as well as texture across her body and face.
When a single light source is used, the contrast between highlights and shadows may be too strong and unflattering for the subject. In these cases, the photographer will need to raise the illumination of the shadows with a reflector or with the use of a fill light.
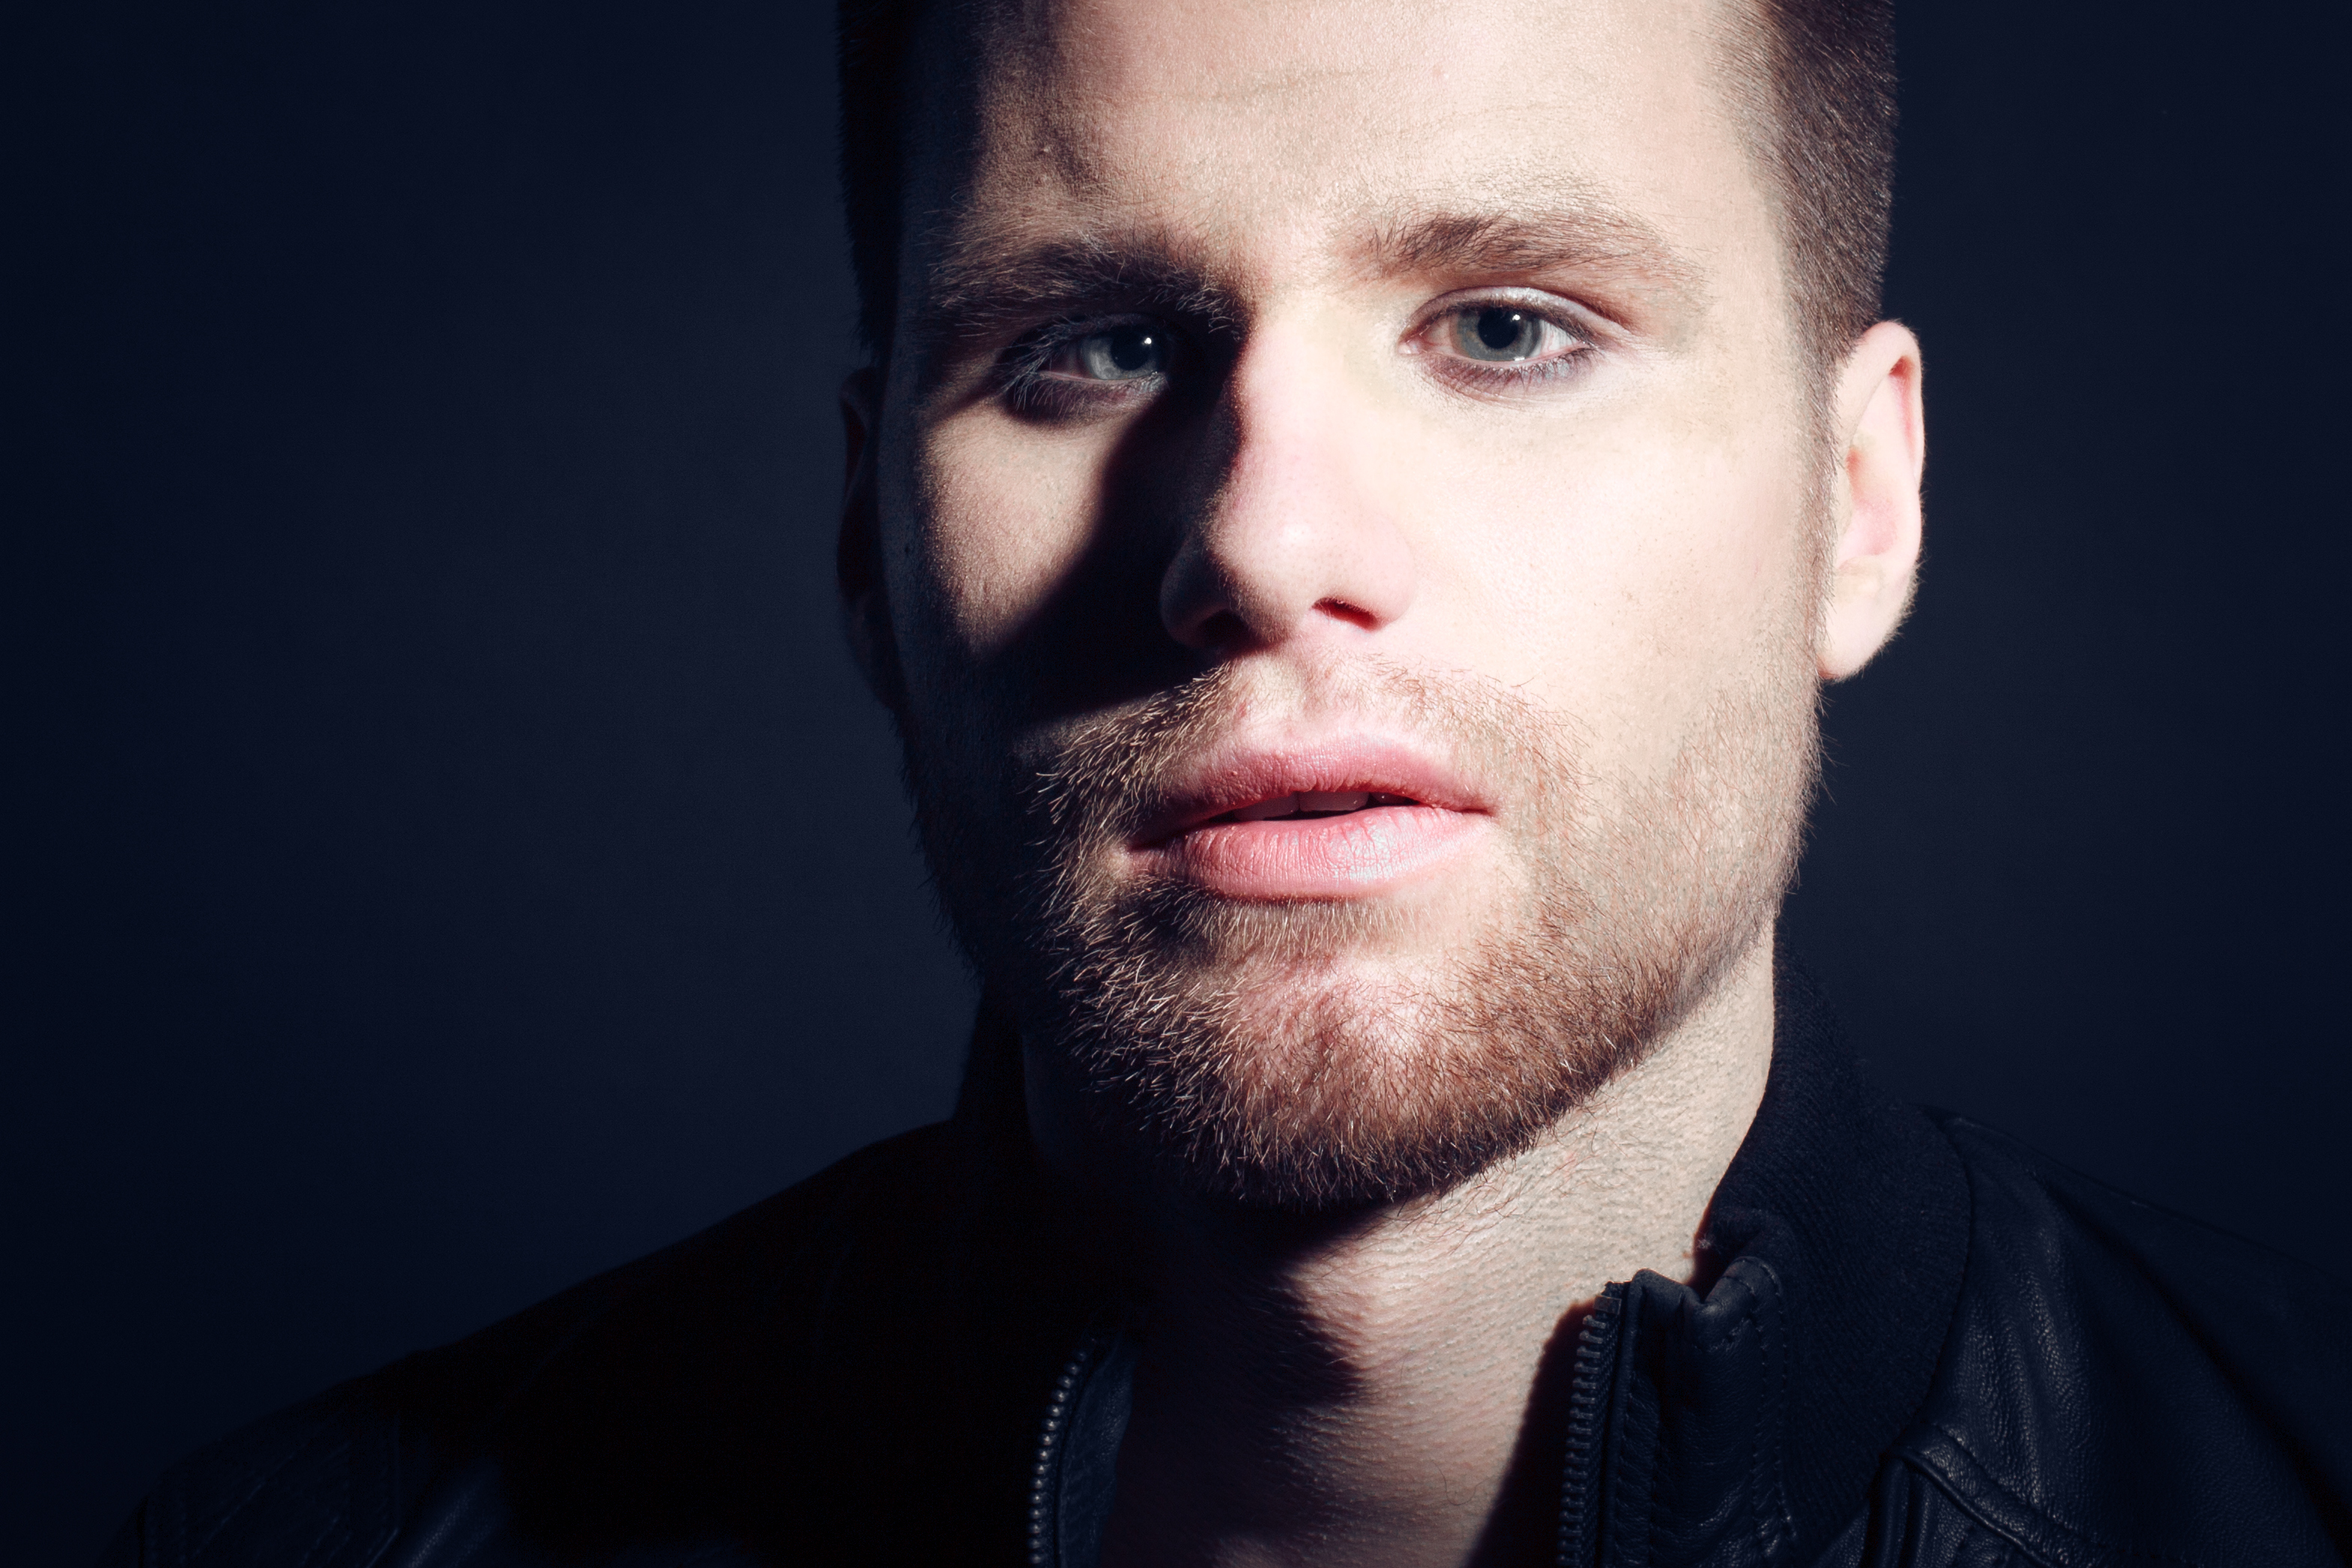
Harsh light and shadows can be seen in this image above.
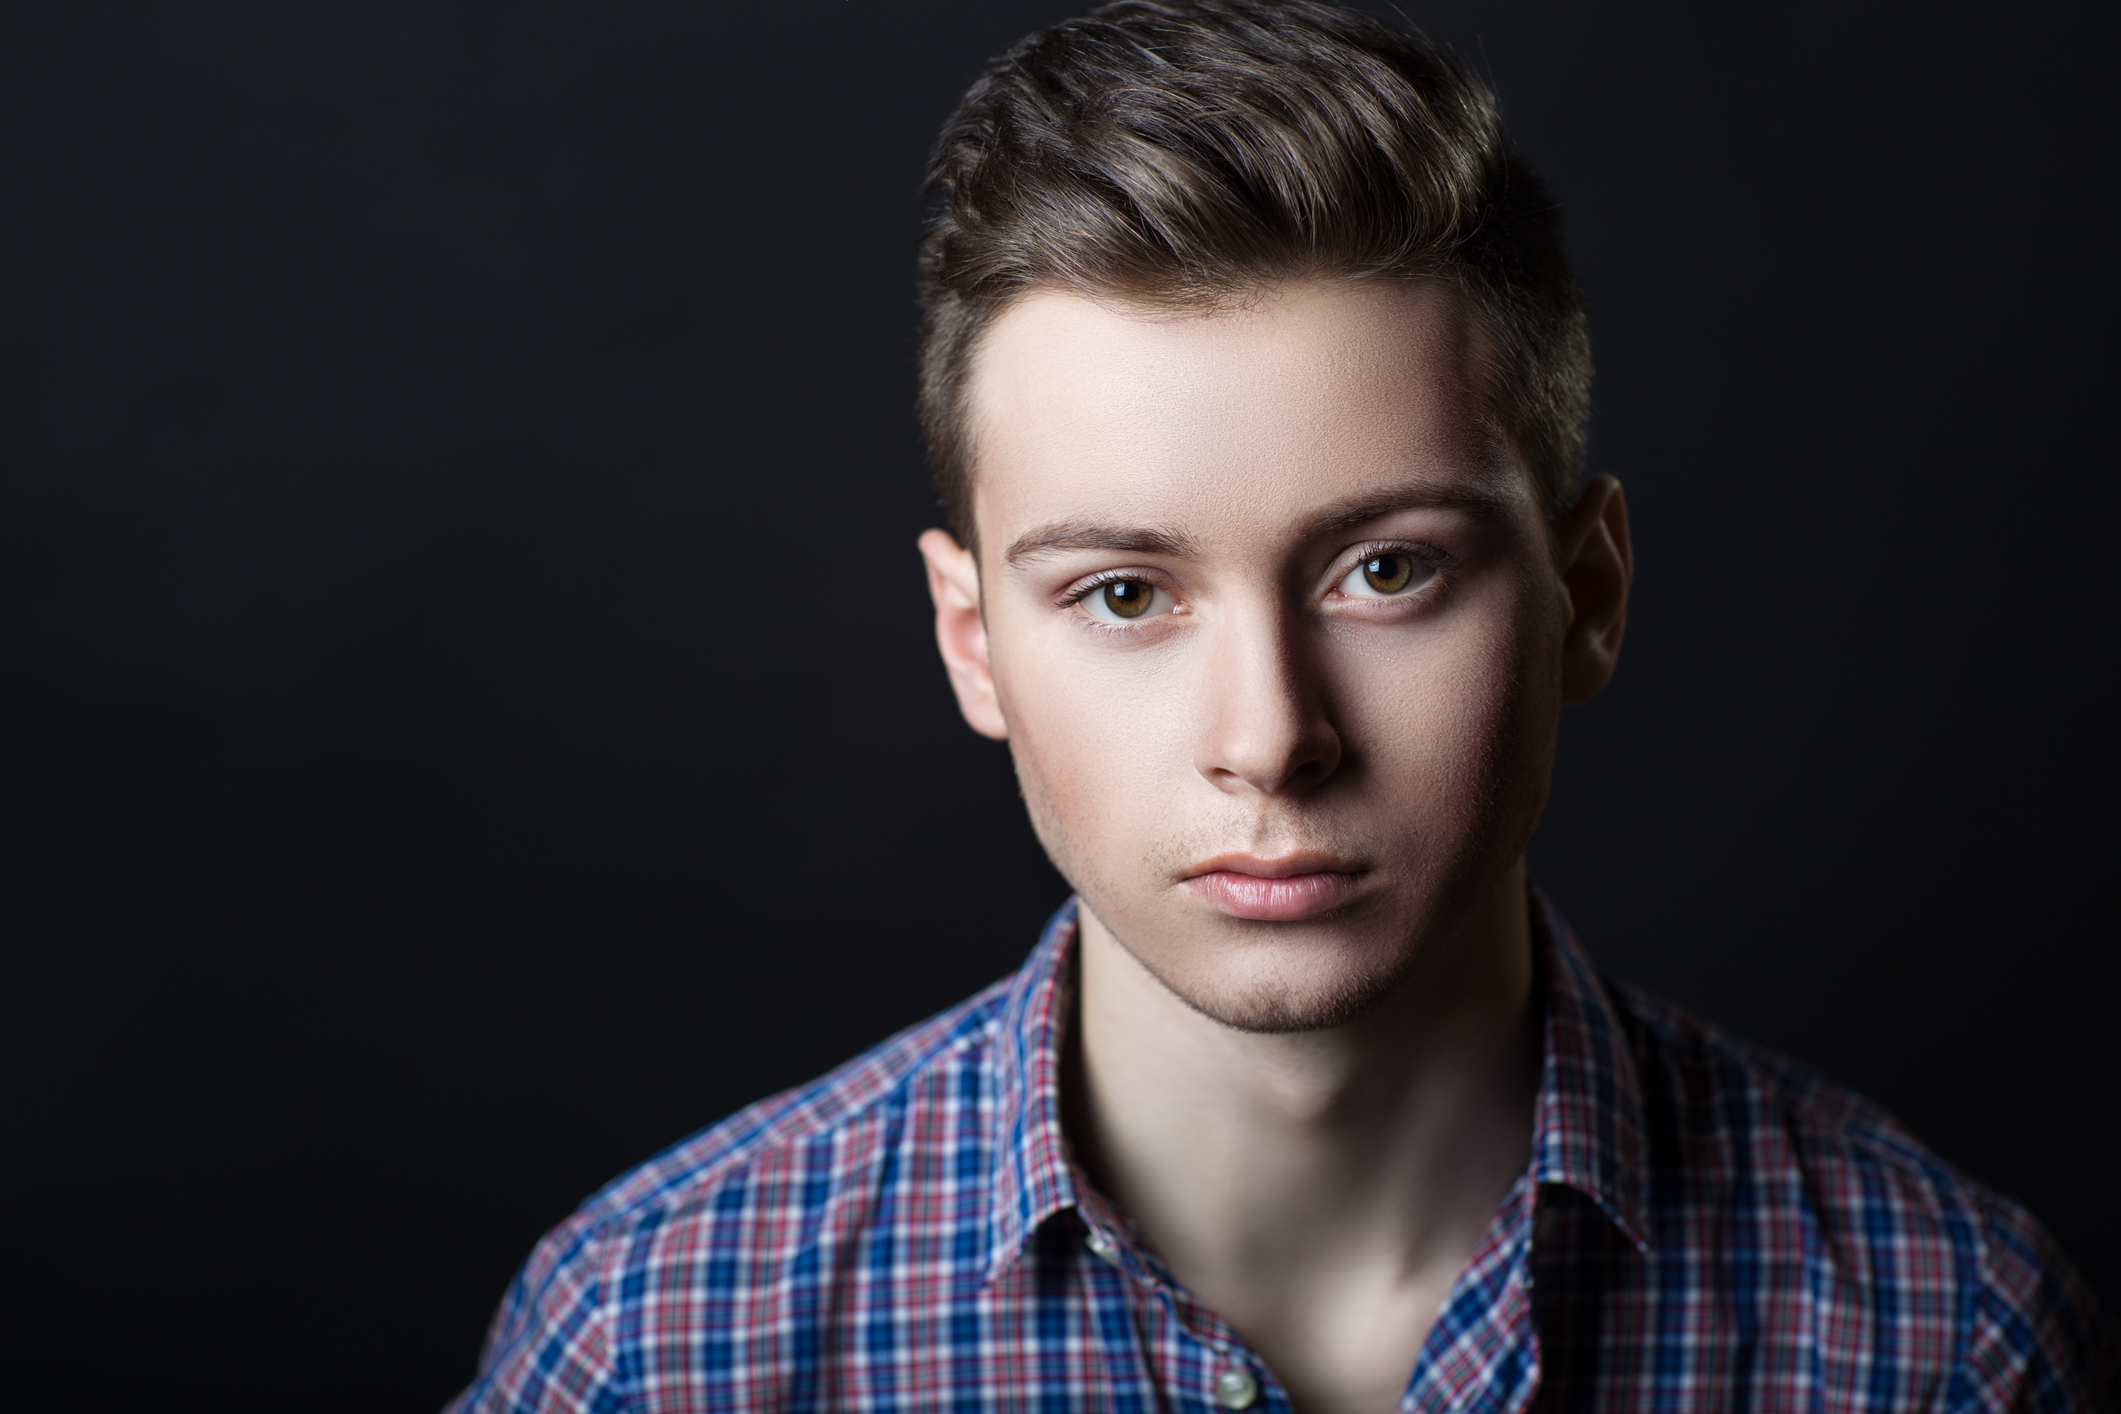
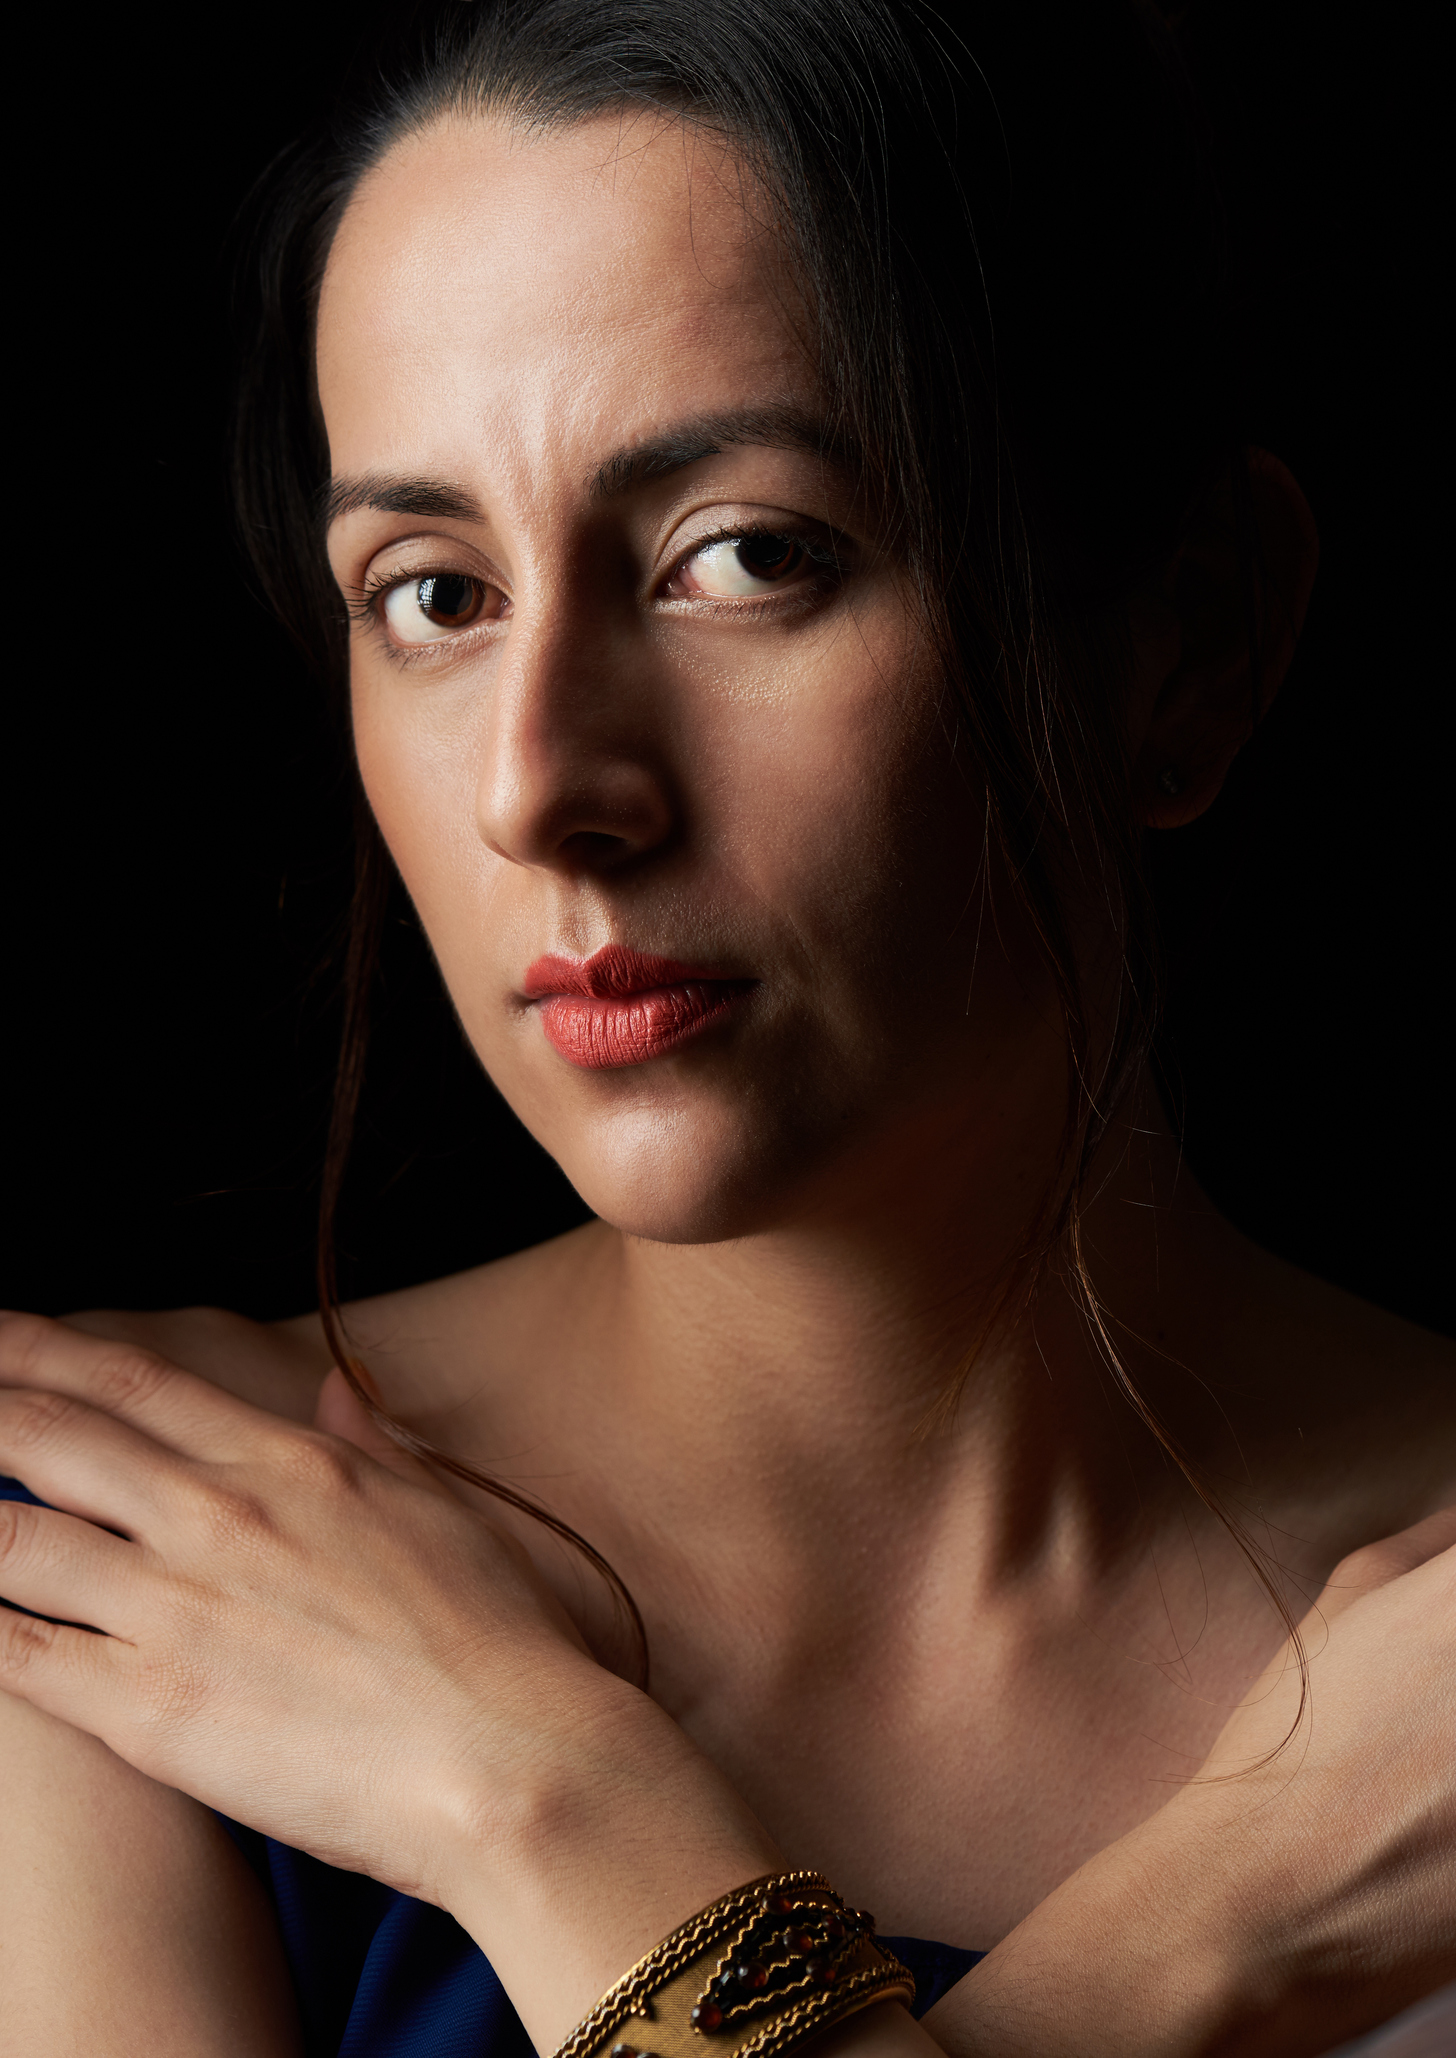
When the light source is filtered by a softbox and a fill light or reflector is utilized, the light is much softer and has less harsh shadows. (above)
Fill Light
The fill light is used to control the contrast of highlight and shadow created by the main light. contrast.
Usually, the fill light will be used with larger modifiers to ensure a soft quality of light on the subject without adding additional secondary shadows. For the same reason, the fill light is usually placed directly behind the camera.
There are situations when the fill may be placed on the shadow side at about 45° from the camera.
The contrast of the lighting is determined by the output of the fill light in relation to the output of the main light.
· Increasing the power of the fill light reduces the contrast of the lighting in the image.
· Decreasing the amount of light from the fill light will increase contrast.
The fill light should be adjusted according to the desired lighting ratio.
Background Light
Lighting can be used to illuminate the background, gaining more depth or separation of the subject with the background in an image. This light is usually placed behind the subject and toward the background to create a desirable pattern.
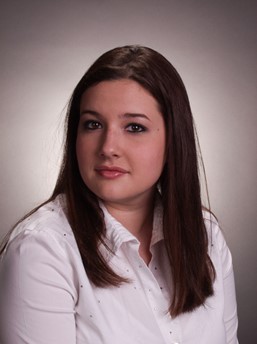
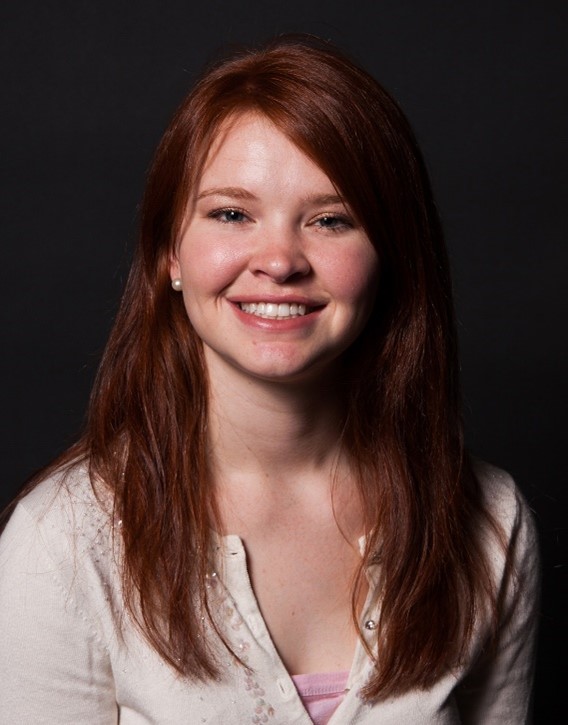
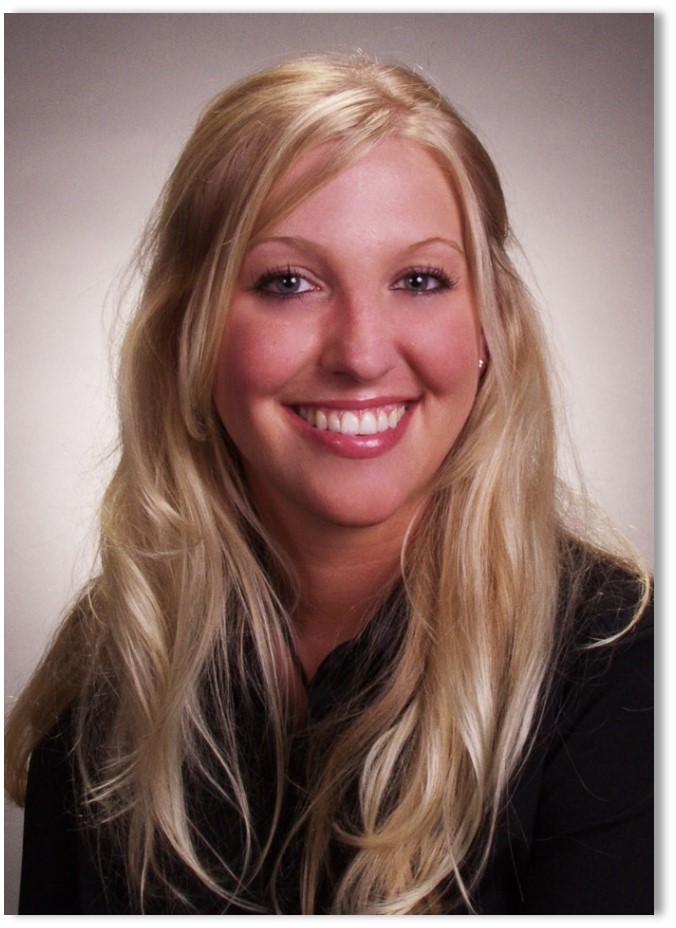
In the image on the left, the subject’s hair blends into the very dark background and creates no separation between the two.
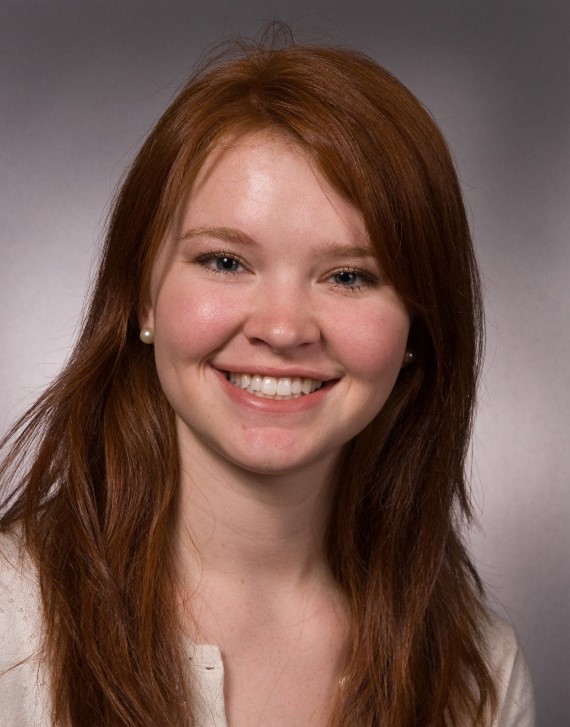
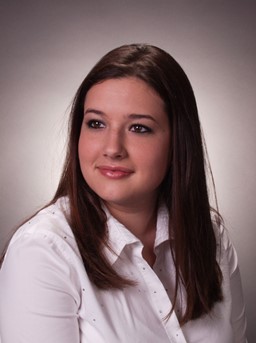
In the image on the right, a background light was placed behind the subject and pointed toward the seamless paper background. This gives a nice gradation to the background and provides good separation between it and her hair.
Hair Light
The hair light illuminates the subject’s hair providing separation from the background. This is especially important when photographing a subject with dark hair against a dark background. It is usually placed above and slightly behind the head. This light should only illuminate the hair and should not spill onto the subject’s face.
Rim Light
The bright, outer glow of light coming from the back side is called a rim light.
This not only helps to provide separation from the background, but it is also a great technique for creating a fashion look for female subjects with longer hair (below).
The light is placed behind the head and directed to the back of the head.
Accent/Kicker Light
This specialty light defines and sculpts the subject by adding a strong highlight from behind the subject to add interest, create form or separation.
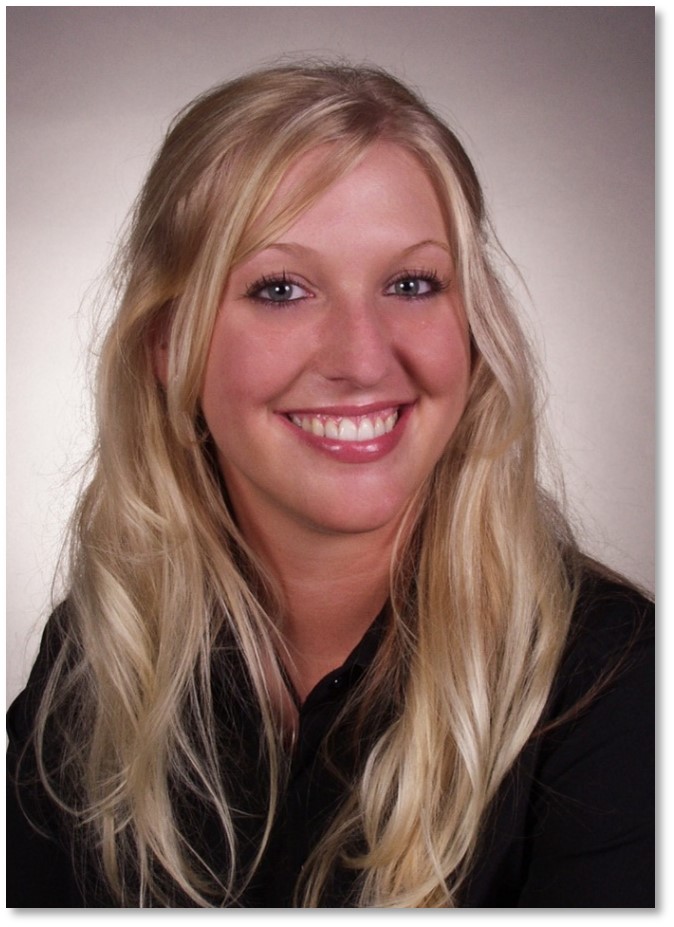
Notice how the image on the right utilizes a kicker light to bring out the subject’s jaw line which helps to define the shape of her face.
Kicker lights are often created by using a strip light or softbox placed behind the subject at about 45° and pointing back towards the subject. This keeps the kicker from becoming too specular and spreads the kicker over a larger area.
Lighting Patterns
If we see the face as having two sides divided down the center of the nose, a face turned toward the camera shows both sides equally. But turn the face to one side or the other, the camera will see more of one side and less of the other.
In the images below with the face divided at the nose, notice that the camera sees more of the right side of the face. The wider side is referred to as the broad side and the narrow side is called the short side.
The lighting pattern above is named for the side it illuminates first. In the image above, with the placement of the main light to the right of the camera. The model’s head is turned to the left, but the light first strikes the side that shows more of her face. This pattern is referred to as broad lighting.
You can also imagine that if we were able to see her ears, we would see the ear on the left, but not on the right. The light first strikes the side of her face (broad side) that is turned toward the camera where we could see her ear.
Placing the light so that it is on the same side as the visible ear will produce a Broad Light Pattern.
Short Lighting
In the image at right, the main light was moved to the left side of the camera. Now the main light first strikes the model’s narrow side of her face, or the side that is turned away from the camera. This lighting pattern is called short lighting.
Creating A Broad Light Pattern
We want to consider that the subject is making a deliberate turn of the head, so they are not looking directly into the camera, but not so far that the nose breaks the plane of the back cheek.
Broad lighting tends to make a face fuller and rounder.
Short lighting tends to slenderize a rounded face and tends to be the most flattering lighting pattern on most subjects.
Using Additive and Subtractive Light
Additive Light
Using light to sculpt the subject requires a degree of directional light that skims and rakes across the subject to create form, shape, and texture. This will be true when working with natural light or artificial lighting. In either case, the efforts of the photographer to create a directional light pattern also creates shadows. In that the photographer is responsible for creating or directing the light onto the subject, so too is the photographer responsible for handling the shadows that are created. In some cases, shadows may be so strong or so deep that additional, or additive, light will be required to provide some degree of illumination of the shadow area.
In the studio environment, this task is usually handled by a fill light. Where the main light is used to create the directional pattern of light on the subject, the fill light’s job is to take care of the shadows. The illumination of the shadows by the fill light determines the lighting ratio of light on the subject.
In the test image below, only the main light is used. The main light is placed to camera left so that the light rakes across the body to bring out the curves and shape of her body. This test image shows the deep shadows that were created from the main light.
Raking light brings out detail by creating highlight and shadow, but the shadows are too strong.
Adding a fill light behind the camera now adds light to the shadow side. The contrast of the highlights and shadows can be controlled by adjusting the intensity of the fill light.
If the fill light is too strong, the overall lighting will appear too flat. Flat lighting does not bring out the curves and contours of body shapes.
Powering down the fill light by one stop provided a nice lighting pattern with form and shape but with good detail in the shadow areas. See image above.
Control of the shadows can also be managed with any number of reflector types in the studio or with natural light. In some lighting scenarios, the main light may be provided by light bounced off of a reflector and the ambient light may be used as the fill.
Subtractive Light
In some cases, a photographer will need to keep light from reaching the subject in order to create a more desirable or a more directional lighting pattern. In using a subtractive lighting technique, the photographer will block unwanted light or reduce the amount of incoming light in order to achieve the desired result.
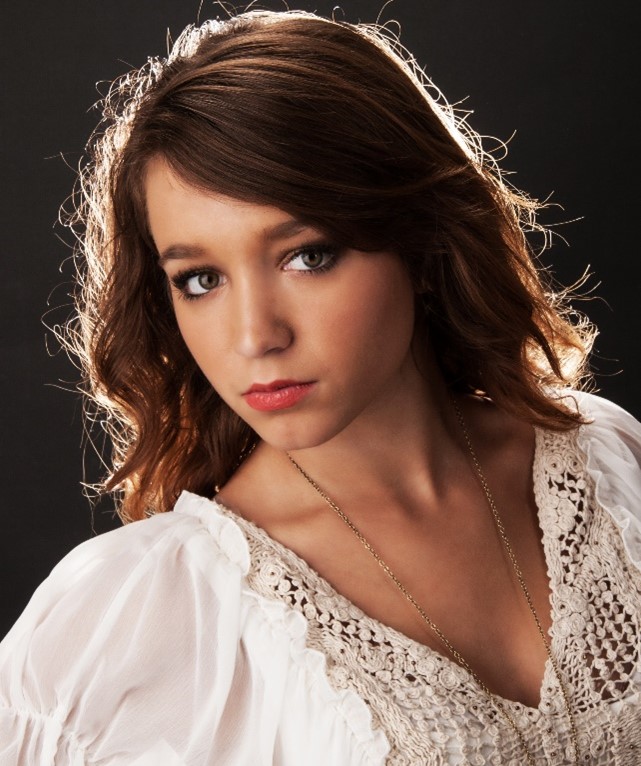
In the image below, the lighting is coming from overhead. In this setting, the overhead light does not provide a desirable directional lighting pattern. The light from above is causing deep shadows in the eyes and strong highlights on her cheeks, forehead and the top of her dress and flowers.
An additive lighting technique could have been used by introducing a bit of flash onto the subject to create a directional lighting pattern and eliminate the dark circles in her eyes.
Instead, a simple subtractive lighting technique was used by moving to a nearby covered walkway as a canopy to block the overhead light. This redirected the direction of light to the side providing a directional lighting pattern.
The canopy allows the side lighting to rake across the body providing texture and detail in her dress and flowers. It also provides nice illumination to the eyes and face.
The architecture of the church provided a canopy to block the overhead light, but this could also be done in some instances with a large black reflector or scrim.
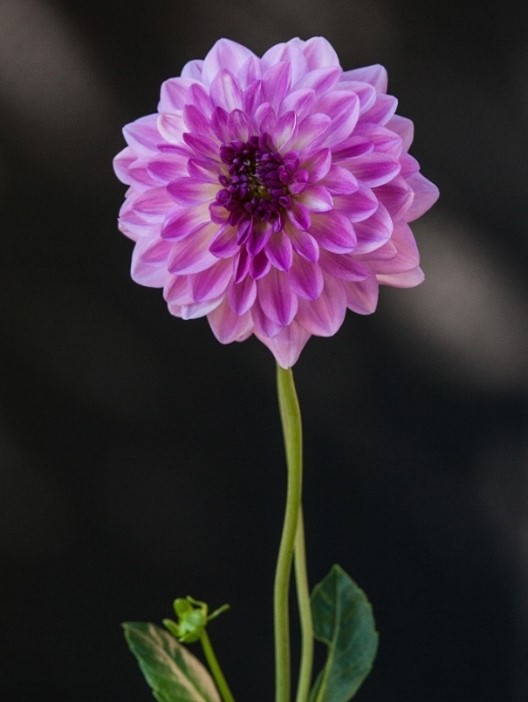
In the image below, a similar subtractive lighting technique is used to eliminate the contrast of the harsh, direct sunlight seen in the background. Creating this canopy also helped create a bit more of a directional lighting pattern on the flower. Adding a second mat board helped to simplify the background.

In the studio set up below, a flag is used to eliminate some of the light from striking the background.
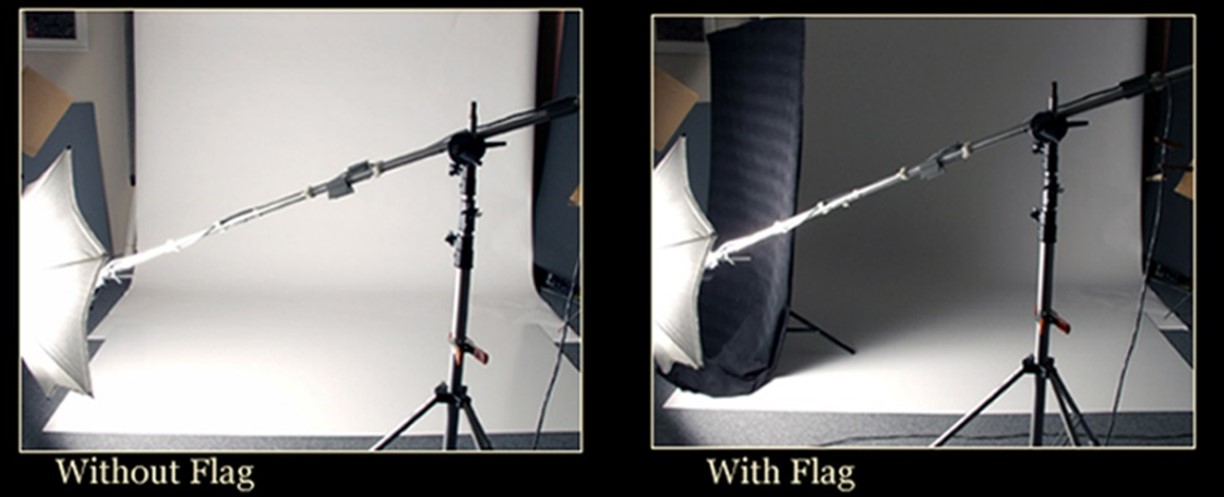
The result of the same flag set up is shown below. The image on the left is lit entirely by the main light. Not only is it illuminating the subject, but it is also illuminating the background.
By using a subtractive technique, the flag is placed between the main light and the background to keep the light off the background.